I was standing in the kitchen, staring at a mound of flour that had somehow turned into a white dust storm, when my friend dared me to create something that could double as a dessert and a conversation starter. I had never thought a cupcake could look like a snow‑cone, but the idea of combining the nostalgic crunch of a frozen treat with the airy softness of a cake sparked a culinary rebellion. I grabbed the ingredients, rolled up my sleeves, and set the timer to 45 minutes, because if you’re going to experiment, you might as well give yourself a deadline that feels like a challenge rather than a chore.
The kitchen smelled like vanilla and butter, but the air was punctuated by the faint scent of sugar crystals clinking against a tin. My eyes flicked between the mixing bowl and the candy cup liners, each piece a miniature stage for the colorful finale. The sound of the mixer spun like a merry‑go‑round, and the gentle clatter of the plastic spoons felt like applause. As the batter rose, I could almost hear the cupcakes whispering, “We’re going to be the life of the party.”
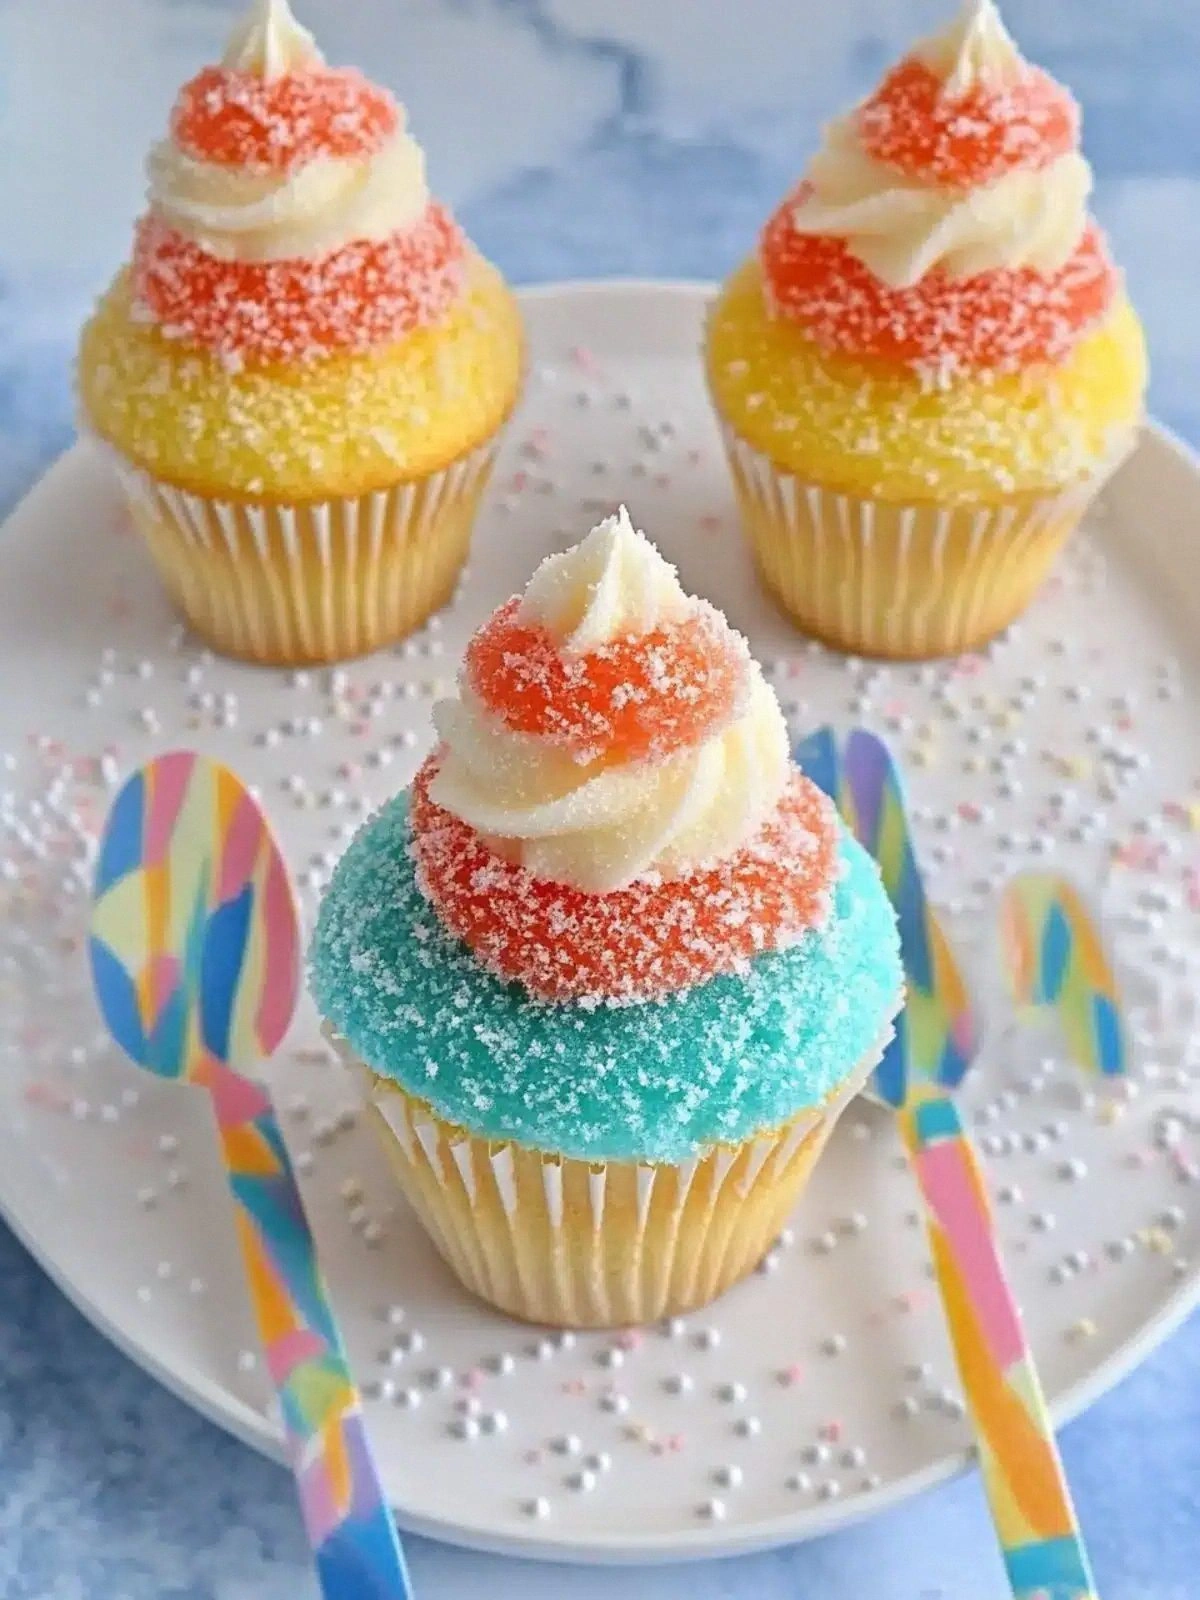
What makes this version stand out is that it’s not just a cupcake; it’s a performance. The batter is light enough to float like a snowflake, yet dense enough to hold the sugary glaze without collapsing. The frosting is a silky, cloud‑like layer that coats the cake like velvet, while the sugar crystals add a crunch that shatters like thin ice under a bite. I’ll be honest — I ate half the batch before anyone else got a chance, and my friends still keep asking for the recipe.
If you’ve ever struggled with cupcakes that fall flat or frosting that spreads like a bad joke, you’re not alone. The trick here is the combination of egg whites and baking powder that gives the batter a lift, and the careful layering of the glaze that keeps the flavor profile bright and fresh. Most recipes get this completely wrong by using too much sugar or too little butter, but I’ve perfected the balance so that each bite delivers a burst of sweetness followed by a buttery finish. Picture yourself pulling this out of the oven, the whole kitchen smelling incredible, and the first bite melting on your tongue.
Let me walk you through every single step — by the end, you’ll wonder how you ever made it any other way. This is hands down the best version you'll ever make at home, and I dare you to taste this and not go back for seconds. And now, the fun part begins.
What Makes This Version Stand Out
- Airiness: The batter uses beaten egg whites to create a cloud‑like texture that rises in the oven, giving the cupcakes a lightness that feels almost ethereal.
- Crunch: The sugar crystals on top add a satisfying crunch that contrasts with the soft cake, mimicking the snap of a snow‑cone.
- Flavor Balance: A modest amount of butter keeps the cupcakes from feeling too dry, while vanilla and milk provide a subtle depth that doesn’t overpower the sweet glaze.
- Visual Appeal: The rainbow swirl of colored frosting makes each cupcake a piece of edible art, perfect for Instagram or a themed party.
- Make‑ahead Friendly: The cupcakes can be assembled ahead of time and frozen, making them an excellent option for last‑minute events.
- Simple Tools: All you need is a mixer, a baking sheet, and some candy cup liners—no fancy equipment required.
- Kid‑Friendly: The small plastic spoons and candy cups make it easy for children to decorate their own cupcakes, turning baking into a creative activity.
Alright, let's break down exactly what goes into this masterpiece...
Inside the Ingredient List
The Flavor Base
All Purpose Flour and Granulated Sugar form the backbone of the cake, providing structure and sweetness. The flour’s protein content is crucial for gluten development, which gives the cupcakes their gentle chew. If you skip the flour, the batter will collapse and the cupcakes will be flat. For a healthier twist, you can substitute half the flour with oat flour, but keep in mind the texture will change slightly.
The Texture Crew
Egg Whites, Baking Powder, and Whole Milk work together to lift the batter and create a silky mouthfeel. The egg whites are beaten separately to incorporate air, which is essential for the airy rise. Baking powder ensures the cupcakes rise evenly, while the milk adds moisture without making the batter too liquid. If you’re using pasteurized eggs, you can use them whole; just be sure to separate the whites for maximum lift.
The Unexpected Star
Salted Butter is the unsung hero that balances sweetness and adds depth. It also helps the frosting set properly, preventing it from becoming too runny. A pinch of sea salt can be added to the frosting for an extra layer of flavor, especially if you’re using a lighter sugar. If you’re vegan, replace the butter with coconut oil, but be aware the frosting will have a different flavor profile.
The Final Flourish
Confectioner’s Sugar, Milk, Food Coloring, and Sugar Crystals create the signature snow‑cone look and taste. The powdered sugar gives the glaze a smooth, cloud‑like consistency, while the milk keeps it from becoming too thick. Food coloring is applied sparingly to avoid a muddy hue; a few drops of red and blue are enough to achieve that patriotic vibe. The sugar crystals are the finishing touch, adding a playful crunch that echoes the original snow‑cone experience.
Everything's prepped? Good. Let's get into the real action...
The Method — Step by Step
- Preheat your oven to 350°F (175°C) and line a muffin tin with 12 candy cup liners. Place the liners on the tin as if you were baking regular cupcakes; the plastic spoons will later help you lift them out. The oven should be fully heated before you start mixing to ensure even baking.
- In a large bowl, whisk together the flour, sugar, baking powder, and a pinch of salt. This dry mix is the foundation; make sure everything is evenly combined to avoid pockets of flour. If you notice any clumps, sift the mixture again for a smoother batter.
- In a separate bowl, beat the egg whites to stiff peaks. The peaks should stand upright when you lift the beaters. This step is crucial for the cupcakes’ airy rise. If you’re short on time, you can use an electric mixer on medium speed for about 3 minutes.
- Gently fold the beaten whites into the dry mixture, then add the whole milk and vanilla extract. Stir until just combined; overmixing will deflate the batter and make the cupcakes dense. The batter should have a slightly thick, pourable consistency.
- Melt the salted butter in a small saucepan over low heat until it becomes liquid, then whisk it into the batter. The butter adds richness and helps the frosting set. Let the mixture cool slightly before adding to ensure the batter stays airy.
- Spoon the batter into the liners, filling each about two‑thirds full. The cupcakes should rise to the top of the liners but not overflow. This is the moment of truth; if the batter is too thick, the cupcakes will be dense.
- Bake for 18–20 minutes, or until a toothpick inserted into the center comes out clean. The cupcakes should look golden and spring back when pressed lightly. Remove from the oven and let them cool in the tin for 5 minutes before transferring to a wire rack to cool completely.
- While the cupcakes cool, prepare the glaze: sift 4 cups of confectioner’s sugar into a bowl, then add 1/4 cup of milk and a few drops of food coloring. Whisk until smooth, adjusting the milk for desired consistency. The glaze should be thick enough to coat but thin enough to drip slightly.
- Once the cupcakes are cool, drizzle the glaze over each one, letting it pool on top. Immediately sprinkle 1 cup of sugar crystals over the glaze while it’s still wet; the crystals will set into a crisp shell. Let the glaze set for 10 minutes before serving.
- Serve immediately, or store in an airtight container for up to 3 days. If you need to reheat, place a cupcake on a microwave‑safe plate and warm on low for 10–15 seconds to restore moisture. Enjoy the crunch and the sweet, airy texture that makes these cupcakes unforgettable.
That's it — you did it. But hold on, I've got a few more tricks that'll take this to another level...
Insider Tricks for Flawless Results
The Temperature Rule Nobody Follows
Most people bake cupcakes at 375°F, but lowering the temperature to 350°F keeps the cupcakes from over‑browning and preserves the airy texture. The slight reduction in heat allows the batter to rise slowly, preventing the outer edges from cooking too fast. If you’re using a convection oven, subtract 25°F from the recipe temperature.
Why Your Nose Knows Best
The first scent you’ll notice is the buttery aroma of the melted butter. A strong butter scent indicates the batter is properly mixed and not over‑whipped. If the smell is too sweet, the sugar is dominating; if it’s too flat, the batter lacks moisture.
The 5-Minute Rest That Changes Everything
After filling the liners, let the batter rest for 5 minutes before baking. This pause allows the flour to hydrate fully, resulting in a more even crumb. Skipping this step can lead to a dry center.
The Sweet Spot for Sugar Crystals
Sprinkle the sugar crystals while the glaze is still wet; if you wait too long, the crystals will dissolve and lose their crunch. Use a light hand to avoid over‑crowding the top, which can cause the glaze to drip off.
The Plastic Spoon Trick
The small plastic spoons are not just decorative; they help you lift the cupcakes out of the liners without damaging the delicate glaze. Gently slide a spoon under the base, then lift. If you’re in a hurry, you can skip the spoons, but the cupcakes may lose their pristine appearance.
Creative Twists and Variations
This recipe is a playground. Here are some of my favorite ways to switch things up:
Citrus Burst
Add a tablespoon of lemon zest to the batter and replace the vanilla with orange extract. The citrus pairs beautifully with the sugar crystals, giving a bright, zesty finish. It’s perfect for a summer brunch.
Chocolate‑Covered Delight
Swap the vanilla extract for cocoa powder and melt dark chocolate to drizzle over the glaze. The chocolate adds a rich depth that contrasts with the crunchy crystals. Serve with a dollop of whipped cream for a decadent treat.
Minty Fresh
Use mint extract instead of vanilla and sprinkle fresh mint leaves on top of the glaze. The mint provides a refreshing bite that lifts the sweetness. This version is ideal for a themed party.
Almond Joy
Add 1/4 cup of toasted almond slivers to the batter and replace the sugar crystals with coconut flakes. The nuts add crunch while the coconut adds a tropical flavor. It’s a nod to the classic candy bar.
Berry Explosion
Fold in 1/2 cup of fresh blueberries into the batter before baking. The berries burst with juice when you bite into the cupcake, creating a juicy surprise. Top with a blueberry glaze for an extra burst of flavor.
Spiced Pumpkin
Incorporate 1/2 cup of pumpkin puree and a pinch of cinnamon into the batter. The pumpkin adds moisture and a subtle warmth, while the cinnamon brings a comforting aroma. This variation is a great fall twist.
Storing and Bringing It Back to Life
Fridge Storage
Store the cupcakes in an airtight container at room temperature for up to 3 days. If you need to keep them longer, place them in the refrigerator for up to 5 days, but let them sit at room temperature for 20 minutes before serving to restore the airy texture.
Freezer Friendly
Wrap each cupcake individually in plastic wrap, then place them in a freezer bag. They’ll keep for up to 2 months. When you’re ready to serve, thaw at room temperature for 30 minutes before reheating.
Best Reheating Method
Place the thawed cupcake on a microwave‑safe plate and heat on low for 10–15 seconds. Alternatively, reheat in a 300°F oven for 5 minutes to revive the crisp glaze. Add a tiny splash of water before reheating; it steams back to perfection and keeps the frosting from drying out.