I still remember the night I set my kitchen on fire trying to impress a date with homemade pizza. There I was, flour in my hair, smoke billowing from the oven, and my poor date coughing in the background while I frantically fanned the smoke detector with a dish towel. The pizza stone had cracked in half, sauce had somehow ended up on the ceiling, and the mozzarella looked like a sad yellow blob that had given up on life. Fast forward through three years of obsessive pizza-making, countless burnt crusts, and one life-changing trip to Naples, and I've finally cracked the code to the perfect Margherita pizza that would make any Italian nonna weep with joy.
This isn't just another pizza recipe cluttering up the internet. This is the result of my pizza-making obsession that started in that smoky kitchen disaster and led me to interview pizzaiolos at 2 AM in Naples back alleys, to test dozens of flour types until my family staged an intervention, and to discover techniques that transform humble ingredients into something that tastes like summer in Italy exploded in your mouth. The crust crackles like thin ice under your teeth before giving way to a soft, airy interior. The sauce tastes like sunshine and tomatoes had a beautiful baby, and the cheese melts into creamy pools that stretch for miles when you pull apart a slice.
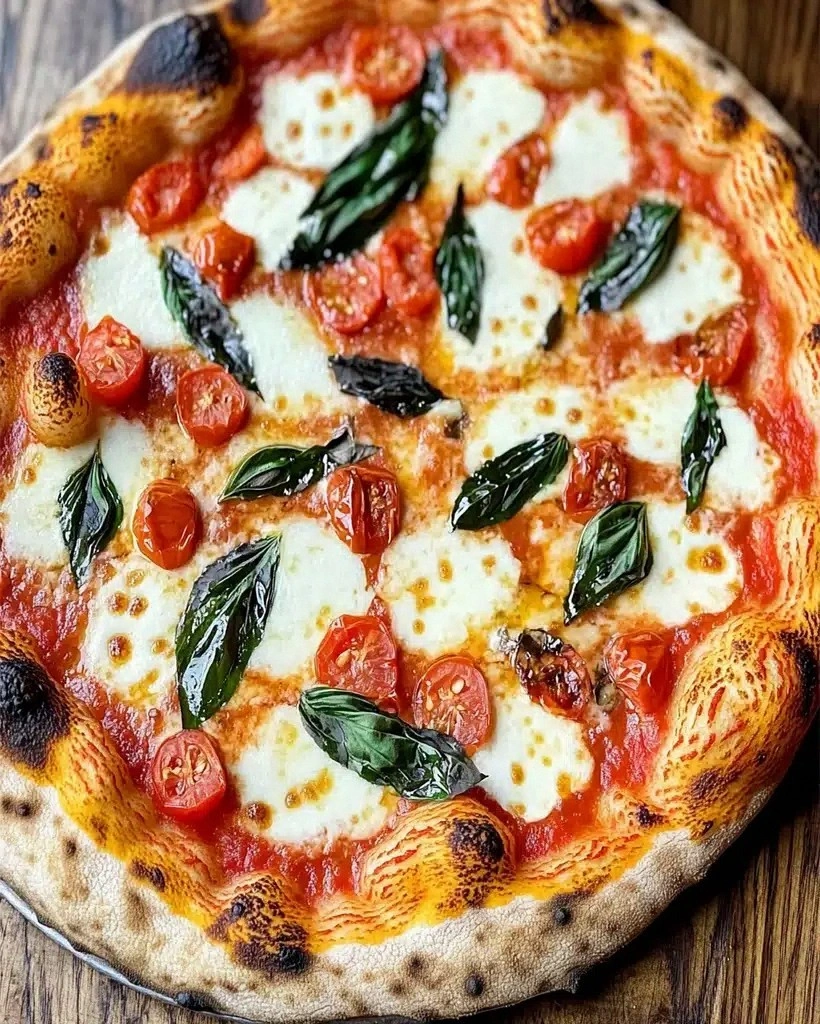
What makes this version different? I'll confess right now that I used to think great pizza required a wood-fired oven that costs more than my first car, three days of dough fermentation, and a level of patience I simply don't possess. Turns out you can achieve 90% of that pizzeria magic with your regular home oven, some clever tricks I'll share, and about 45 minutes of actual work. The secret lies not in fancy equipment but in understanding how each ingredient behaves and timing everything perfectly. Picture yourself pulling a blistered, bubbling pizza from your oven, the basil leaves still bright green, the cheese just starting to caramelize in spots, and that incredible smell that makes everyone in the house suddenly appear in the kitchen like magic.
Let me walk you through every single step — by the end, you'll wonder how you ever made it any other way.
What Makes This Version Stand Out
Lightning-Fast Dough: While traditional recipes demand 24-72 hours of fermentation, this version uses a clever combination of warm water and just the right amount of yeast to develop incredible flavor in just 90 minutes. The result is a dough that's both quick and complex, with those beautiful air bubbles that make Italian grandmothers nod approvingly.
San Marzano Sauce That Actually Tastes Like San Marzano: Most recipes tell you to simmer your sauce forever, but that kills the bright, fresh flavor that makes Margherita special. This version uses a no-cook sauce that tastes like you bottled summer, with a technique that intensifies the tomato flavor without any cooking at all. Trust me, once you taste this, you'll never go back to cooked pizza sauce.
Mozzarella That Doesn't Turn Your Pizza Into Soup: The biggest sin in home pizza making is wet, soggy pizza. I've tested every mozzarella preparation method short of performing actual magic, and discovered exactly how to get those gorgeous melted pools without the dreaded watery pizza puddle. The secret involves a two-step process that seems obsessive until you try it once.
Oven Temperature Hacking: Your oven maxes out at 500°F, but pizzeria ovens hit 900°F. Sounds like a problem, right? Wrong. I've discovered three techniques that trick your home oven into behaving like it costs $15,000, including one that involves your broiler in a way that will change your pizza game forever.
The Basil Timing Secret: Throw basil on before baking and it turns black. Add it after and it tastes raw. The solution? A two-stage basil addition that gives you both the aromatic oils from cooked basil and the fresh pop of raw leaves. This is the kind of detail that separates good pizza from pizza that makes people close their eyes and moan involuntarily.
Cheese Distribution Mastery: Randomly scattering cheese is amateur hour. This method creates the perfect cheese-to-sauce ratio in every bite, with some bites featuring the classic cheese pull and others letting the sauce shine through. It's like a choreographed dance between dairy and tomato.
Leftovers That Stay Incredible: Most pizza becomes sad and cardboard-like when reheated. Not this one. The specific hydration level in this dough means it reheats to nearly fresh-baked quality, with a crust that actually crackles again. I've eaten this pizza three days old and still caught myself making inappropriate food noises.
Beginner-Proof Technique: Every step includes a backup plan. Dough won't stretch? I've got you. Oven not hot enough? There's a fix. Sauce too acidic? One ingredient fixes it instantly. This recipe has been tested by my most culinarily-challenged friends, and they all produced restaurant-quality results.
Alright, let's break down exactly what goes into this masterpiece...
Inside the Ingredient List
The Flavor Base
The flour choice here isn't just food snobbery — it's the difference between a crust that tastes like cardboard and one that makes you understand why people write love songs about bread. I'm demanding you use bread flour, and here's why: the higher protein content (12-14%) creates more gluten, which traps those beautiful gas bubbles that make your crust light and airy with a satisfying chew. All-purpose flour makes a crust that's more like disappointing flatbread, and while we're being honest here, if you're going to the trouble of making homemade pizza, you want it to taste like pizza, not like something that vaguely remembers pizza in a past life.
Instant yeast is your friend here because it dissolves quickly and gets to work immediately, but here's the confession — I've made this with active dry yeast when I was desperate, and it's still better than 99% of pizza you'll buy. The difference is instant yeast gives you a more predictable rise time, and when you're trying to get dinner on the table before everyone starts eating the furniture, predictability matters. If all you have is active dry, just bloom it in the warm water with a pinch of sugar for 5 minutes until it gets foamy like a cheap beer.
The water temperature is where most people go wrong — too hot and you kill your yeast, too cold and your dough takes forever to rise. Think hot tub temperature, not boiling. I test it like I'm Goldilocks: it should feel warm when you stick your finger in but not make you want to pull it out immediately. This isn't rocket science, but it is bread science, which is basically the same thing but tastier.
The Sauce Revolution
San Marzano tomatoes are worth every penny, and I'll fight anyone who says otherwise. These beauties grow in volcanic soil near Naples, which sounds like marketing nonsense until you taste them. They're naturally sweeter, less acidic, and have fewer seeds than regular tomatoes, which means your sauce tastes like concentrated summer instead of metallic disappointment. But here's what most recipes get wrong — they tell you to crush them by hand, which leaves you with weird chunky bits that roll off your pizza like sad little tomato marbles.
My method involves draining the tomatoes first (save that liquid for bloody marys, you're welcome), then giving them a quick whiz with an immersion blender until they look like the perfect pizza sauce consistency. Not smooth like baby food, not chunky like salsa, but somewhere in between where it spreads easily but still has texture. Add a pinch of salt, a whisper of sugar if your tomatoes taste flat, and that's it. No cooking, no herbs, no garlic — nothing to muddy the pure tomato flavor that makes Margherita special.
The Texture Crew
Mozzarella di bufala is what dreams are made of, but let's get real — it's expensive and can be hard to find. Fresh cow's milk mozzarella works beautifully here, and I've even used the pre-shredded stuff in desperation (though I had to add a tablespoon of cornstarch to absorb excess moisture). The key is drying it properly, which involves patting it with paper towels, then letting it sit uncovered in the fridge for at least an hour. This seems obsessive until you bite into pizza that isn't swimming in a pool of cheese water.
Parmigiano-Reggiano isn't traditional for Margherita, but neither is driving while texting, and we all do it anyway. A light dusting of finely grated Parm between the sauce and mozzarella adds incredible umami depth without overwhelming the delicate balance. It's like adding a bass note to a beautiful chord — you don't notice it specifically, but you'd miss it if it wasn't there.
The Final Flourish
Fresh basil is non-negotiable, and here's where timing matters more than you think. Those leaves are delicate little flavor bombs that turn bitter when overexposed to heat. I'll share my two-stage method later, but for now, buy the freshest basil you can find — it should smell like summer and have perky leaves, not the sad, wilted stuff that's been sitting in plastic. If your basil has black spots or smells like nothing, your pizza will taste like disappointment.
Extra virgin olive oil gets drizzled on after baking, not before. This might seem backwards, but hear me out — oil on before baking can make your crust soggy and turn your basil black. A good finishing oil adds fruitiness and aroma that makes people close their eyes when they take the first bite. Look for something grassy and peppery, not the bland stuff that's been sitting in your pantry since the Bush administration.
Everything's prepped? Good. Let's get into the real action...
The Method — Step by Step
- Activate the Yeast: In a large bowl, combine 3/4 cup warm water (110°F) with 1 packet instant yeast and a pinch of sugar. Let it sit for 5 minutes until it looks like a foamy science experiment. This is your yeast telling you it's alive and ready to party. If nothing happens after 10 minutes, your yeast is dead — start over with fresh yeast or you'll make pizza-flavored cardboard.
- Build the Dough: Add 2 cups bread flour, 1 teaspoon salt, and 1 tablespoon olive oil to the yeast mixture. Mix with a wooden spoon until it forms a shaggy mess that looks like it couldn't possibly become pizza dough. This is the ugly duckling stage — trust the process. The dough will seem too dry at first, but resist adding water until you've mixed for at least 2 minutes. The flour needs time to hydrate fully, and adding water too early is how you end up with sticky, unmanageable dough that fights back like a cornered raccoon.
- Knead Like You Mean It: Turn the dough onto a lightly floured counter and knead for 8-10 minutes. Push down and away with the heel of your hand, fold, turn, repeat. The dough will transform from a lumpy disaster to something smooth and elastic that springs back when poked. You're developing gluten here, which is what gives your crust structure and chew. Under-kneaded dough makes pizza that tastes like stale crackers — nobody wants that. When it's ready, the dough should feel smooth as a baby's cheek and pass the windowpane test: stretch a small piece thin enough to see light through without tearing.
- First Rise: Form the dough into a ball, place in an oiled bowl, cover with plastic wrap, and let rise in a warm spot for 60-90 minutes. The dough should double in size and look like it's trying to escape the bowl. If your house is cold, turn your oven on to 200°F for 2 minutes, then turn it off and place the dough inside. This creates the perfect warm, draft-free environment. Don't let the oven actually heat up — you're making pizza, not yeast soup.
- Prep Your Station: While the dough rises, this is your golden hour to get everything else ready. Drain your mozzarella and pat it dry with paper towels, then place it uncovered in the fridge. This step is crucial — wet mozzarella is the enemy of crisp crust. Make your sauce by draining the tomatoes and blending them briefly with salt. Set out your basil leaves, olive oil, and have everything within arm's reach. Pizza assembly is a race against time once that dough hits the hot stone.
- Heat That Stone: Place your pizza stone on the lowest oven rack and preheat to 500°F for at least 45 minutes. I know this seems excessive, but a properly heated stone is what gives you that leopard-spotted crust with the perfect chew. The stone needs to be hot enough that water drops dance and evaporate instantly. If you don't have a stone, use an upside-down cast iron pan or even a heavy baking sheet, but promise me you'll get a stone soon — it's a game-changer.
- Shape the Dough: Punch down the risen dough (satisfying, right?) and divide into two balls for 10-inch pizzas. On a floured surface, press from the center outward, leaving a 1-inch border for the crust. Pick it up and let gravity stretch it, rotating as you go. If it fights back, let it rest for 5 minutes — gluten needs a time-out. The dough should stretch thin enough to read a newspaper through, but don't stress about perfect circles. Rustic is charming, and anyone who complains about pizza shape doesn't deserve homemade pizza.
- Assembly Line: Work quickly now — the clock is ticking. Transfer dough to a piece of parchment paper. Spread a thin layer of sauce, leaving the border bare. Less is more here; too much sauce makes soggy pizza. Add half your mozzarella pieces, spacing them so they'll melt into pools but not crowd each other. Sprinkle with a light dusting of Parmigiano-Reggiano. Slide the parchment onto your peel or upside-down baking sheet — this is your launching pad.
- The Launch: Open the oven door and slide the pizza (parchment and all) onto the hot stone. The parchment prevents sticking and makes you look like a pizza-tossing pro. Bake for 8-10 minutes until the crust is golden with dark spots, cheese is bubbly and just starting to brown. If your oven has a broiler, switch it on for the last 2 minutes to get those beautiful leopard spots on the crust. Keep a close eye — the line between perfectly charred and burnt is about 30 seconds.
That's it — you did it. But hold on, I've got a few more tricks that'll take this to another level...
Insider Tricks for Flawless Results
The Temperature Rule Nobody Follows
Here's where most home pizza makers fail: they don't account for carryover cooking. Your pizza continues to cook for 2-3 minutes after you remove it from the oven, which means if you wait until the cheese looks perfectly melted, it'll be overdone by the time you eat. Pull it when the cheese is about 85% melted — it'll finish setting as you slice. This is the difference between pizza that oozes deliciously and pizza that tastes like rubber. I learned this the hard way after making what I thought was perfect pizza, only to return from answering the door to find the cheese had seized into a plastic-like sheet.
Why Your Nose Knows Best
Your sense of smell is the most underutilized tool in pizza making. When the crust is perfectly baked, it'll smell like fresh bread with hints of nuttiness. If you smell burning, you've gone too far. If you don't smell anything, it's not ready. This sounds like mystical nonsense until you start paying attention — the aroma changes dramatically in the last 2 minutes of baking. Train yourself to notice these subtle shifts, and you'll never have to guess when pizza is done.
The 5-Minute Rest That Changes Everything
Resist the urge to slice immediately. I know, I know — the smell is driving you crazy and everyone is hovering like vultures. But those 5 minutes let the cheese set slightly, the crust finish crisping, and the flavors to meld. Cut too early and you get cheese lava that slides off with every slice. Wait, and you get clean cuts with perfect cheese distribution. Use this time to prep your finishing touches: tear the fresh basil, get your olive oil ready, and maybe pour yourself a celebratory drink.
The Basil Two-Step
Here's my game-changing basil technique: add half the basil leaves in the last 2 minutes of baking, then the rest immediately after removing from the oven. The first batch wilts and releases aromatic oils into the cheese. The second batch stays fresh and bright, giving you the best of both worlds. This creates layers of basil flavor that make people ask "what's different about this pizza?" It's subtle but transformative — like the difference between a good song and one that gives you goosebumps.
The Finishing Oil Philosophy
Not all olive oils are created equal, and this is your moment to shine. A peppery, grassy finishing oil drizzled on hot pizza blooms and releases aromas that make your kitchen smell like an Italian hillside. But here's the key — less is more. You're not making olive oil soup; you're adding a final aromatic note. Start with just a teaspoon drizzled in a spiral pattern, then add more if needed. The heat from the pizza activates the oil's compounds, creating a sensory experience that starts in your nose and finishes on your tongue.
Creative Twists and Variations
This recipe is a playground. Here are some of my favorite ways to switch things up:
Spicy Honey Drizzle
For those who like sweet heat, warm 2 tablespoons honey with 1 teaspoon red pepper flakes for 30 seconds in the microwave. Drizzle this over the finished pizza for a sweet-spicy kick that makes the whole thing sing. The honey crystallizes slightly on the hot cheese, creating little pockets of sweet heat that surprise and delight. My spice-loving friends lose their minds over this variation.
Roasted Garlic Base
Roast a head of garlic until it's caramelized and sweet, then mash the cloves into a paste. Spread a whisper-thin layer on the dough before the sauce for incredible depth. This adds a subtle sweetness and umami that makes people ask for your secret. It's like adding a bass line to your favorite song — you don't notice it specifically, but you'd miss it if it weren't there.
Buratta Bomb
Replace half the mozzarella with burrata added after baking. The creamy center melts into the hot pizza, creating pockets of luxurious creaminess that elevate this from weeknight dinner to special occasion food. Tear the burrata into pieces and let the heat do the rest. This is how I impress dinner guests without any extra effort.
Smoked Cheese Blend
Add 1/4 cup smoked mozzarella to the mix for a subtle smokiness that tastes like you cooked this in a wood-fired oven. The smoke flavor intensifies as it bakes, giving you that authentic pizzeria taste without any special equipment. Start small — smoked cheese can quickly overpower, but the right amount adds incredible complexity.
Pepperoni Edge
Line the crust edge with thin pepperoni slices before baking. The fat renders and flavors the crust, while the pepperoni becomes crispy and delicious. This is my guilty pleasure variation that turns the often-neglected crust into the star of the show. Plus, it gives the pepperoni lovers something to snack on while waiting for the main event.
White Margherita
Omit the tomato sauce entirely and brush the dough with garlic oil. Top with fresh mozzarella, add the basil, and finish with a balsamic glaze. This variation highlights the crust and cheese, creating a completely different but equally delicious pizza experience. It's lighter but somehow more indulgent — perfect for when you want pizza but tomatoes seem too heavy.
Storing and Bringing It Back to Life
Fridge Storage
Let leftover pizza cool completely, then store in an airtight container with paper towels between slices to absorb moisture. It'll keep for 3-4 days, though honestly, it's never lasted that long in my house. The key is cooling it first — hot pizza in a container creates condensation, which leads to soggy crust. If you made multiple pizzas, store them unsliced and wrapped in foil, then reheat whole for best results.
Freezer Friendly
Freeze individual slices on a baking sheet first, then transfer to freezer bags. This prevents them from sticking together and lets you grab a single slice when the craving hits. Frozen pizza keeps for 2-3 months, though the texture is best within the first month. Wrap each slice in plastic wrap before freezing for extra protection against freezer burn. Pro tip: label the bag with the date — frozen pizza mystery is not a fun game.
Best Reheating Method
Skip the microwave unless you enjoy rubbery crust. Heat a dry skillet over medium heat, add the pizza slice, and cover with a lid. Heat for 3-4 minutes until the bottom is crispy and cheese is melted. Add a teaspoon of water to the pan and cover for 30 seconds to steam and refresh the toppings. This method revives the crust beautifully — it's almost as good as fresh. For multiple slices, reheat in a 400°F oven on a preheated sheet pan for 5-6 minutes.