I remember the night my friend dared me to turn a mediocre batch of white chocolate cookies into something that would make Santa jealous. The kitchen smelled like burnt sugar and a hint of peppermint that made my eyes water, yet I was determined to rescue the dough from its fate. I whisked, I measured, I stared at the screen for the perfect ratio, and I realized that the secret lies not in the ingredients alone but in the way they dance together. I dare you to taste this and not go back for seconds.
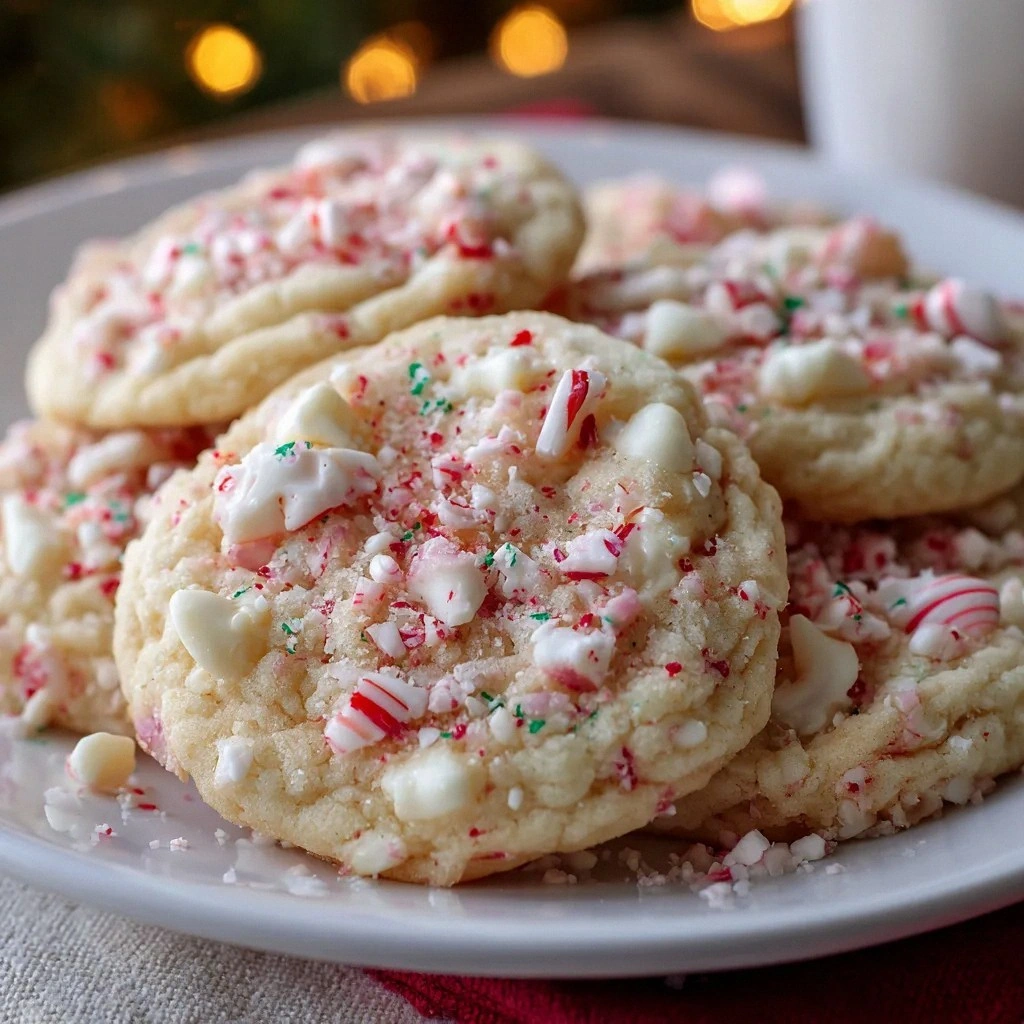
Picture yourself pulling a tray of golden, frosted cookies from a preheated oven, the air thick with the scent of vanilla and mint. The edges are crisp, the centers chewy, and each bite releases a cascade of white chocolate that melts like silk. If you've ever struggled with cookies that fall flat or crumble like a bad joke, you're not alone—and I've got the fix. This is hands down the best version you'll ever make at home.
What makes this recipe stand out is that it marries the richness of white chocolate with the bite of peppermint in a way that feels both nostalgic and fresh. The dough is buttery but not greasy, the sugar content balanced to give a subtle caramel undertone, and the peppermint extract is used in a precise amount to avoid overpowering the chocolate. The result is a cookie that feels like a holiday treat even in the middle of July. If you think the name is just a gimmick, think again—this is a flavor symphony.
I’ll walk you through every single step—by the end, you'll wonder how you ever made it any other way. Stay with me here; this is worth it. The next part? Pure magic. And if you’re ready for a game-changer, keep reading because the trickiest part is where the dough meets the oven, and it’s pure alchemy.
What Makes This Version Stand Out
- Flavor: The peppermint extract is layered with vanilla, creating a depth that lingers on the palate. The white chocolate chips melt into a glossy finish that feels almost liquid. The result is a cookie that feels like a holiday memory in every bite.
- Texture: The dough achieves a perfect balance between chewy centers and crisp edges. The crushed peppermint candies add a delightful crunch that contrasts the softness of the chocolate. The result is an unforgettable mouthfeel.
- Visual Appeal: The cookies look like tiny snowflakes, with flecks of white chocolate and peppermint glittering on the surface. The contrast of white and green makes them Instagram‑ready. Every cookie is a work of art.
- Ease: The recipe uses pantry staples with no special equipment. Even a novice can follow the steps without feeling overwhelmed. It’s the kind of cookie that invites experimentation.
- Crowd‑Pleaser: The combination of chocolate and mint is universally loved, making it a hit at parties and holiday gatherings. The cookies are small enough to serve as a snack or dessert. They’re a crowd‑satisfying treat.
- Make‑ahead Friendly: The cookies bake to a firm yet tender state that can be stored in an airtight container for up to a week. They can also be frozen for longer storage. They’re practically a “cook once, enjoy later” recipe.
Inside the Ingredient List
The Flavor Base
All-purpose flour is the backbone of your cookies, providing structure and a soft texture. It absorbs the butter and sugars, creating a dough that holds together. If you skip the flour, your cookies become a greasy mess that falls apart. Use a medium‑protein flour to keep the cookies tender.
The Texture Crew
Baking soda is a leavening agent that helps the cookies rise and become fluffy. Without it, the cookies will be flat and dense. Salt is just a pinch; it enhances the sweetness and balances flavors. A dash of salt can bring out the richness of the chocolate.
The Unexpected Star
Peppermint extract is where the magic happens! It infuses the cookies with a refreshing minty flavor that cuts through the sweetness. Use a high‑quality extract for a cleaner, less artificial taste. If you don’t have peppermint extract, you can substitute crushed peppermint candies for a more intense flavor.
The Final Flourish
White chocolate chips are creamy and sweet, they melt beautifully and add a luxurious touch. Crushed peppermint candies add a delightful crunch and a burst of peppermint flavor. The combination of white chocolate and peppermint creates a flavor profile that feels both festive and sophisticated.
Everything's prepped? Good. Let's get into the real action.
The Method — Step by Step
- Preheat your oven to 350°F (175°C). Line a baking sheet with parchment paper or a silicone mat. This step might seem trivial, but a properly preheated oven ensures even baking. The cookies should bake evenly from the center to the edges.
- Combine the dry ingredients. In a large bowl, whisk together flour, baking soda, and salt. The dry mix should feel like a fine powder. This helps distribute the leavening agent evenly.
- Cream the butter and sugars. In a separate bowl, beat softened butter, granulated sugar, and brown sugar until light and fluffy. This usually takes about 2-3 minutes on medium speed. The creaming process incorporates air, which contributes to the cookie’s lift.
- Add the eggs and extracts. Beat in the large egg, vanilla extract, and peppermint extract. The egg binds the ingredients, while the extracts add depth. Be careful not to overmix; just until combined.
- Fold in the dry mixture. Gently fold the dry ingredients into the wet mixture using a spatula. The dough will be thick but manageable. Avoid overmixing to keep the cookies tender.
- Stir in the white chocolate chips and peppermint candies. The chips should be evenly distributed throughout the dough. The candies add texture and an extra burst of mint. This step is where the magic starts to feel real.
- Shape the dough. Drop rounded tablespoons of dough onto the prepared baking sheet, spacing them 2 inches apart. Press them slightly to flatten. This ensures even baking and a uniform size.
- Bake for 10-12 minutes. The cookies should be golden at the edges but still soft in the center. The center will continue to set as they cool. Keep an eye on them; ovens vary.
- Cool on the sheet for 5 minutes. Then transfer to a wire rack to cool completely. This step prevents the cookies from becoming too soft. It also allows the flavors to settle.
- Enjoy and share. The cookies are best when still warm, but they hold up well at room temperature. Serve them with a glass of milk or a hot cocoa for a classic combo.
That's it — you did it. But hold on, I've got a few more tricks that'll take this to another level. The next section will give you insider knowledge that turns ordinary cookies into extraordinary ones.
Insider Tricks for Flawless Results
The Temperature Rule Nobody Follows
Many bakers bake at 375°F, but for these cookies, 350°F is optimal. The lower temperature keeps the edges from browning too quickly while allowing the center to set properly. It also preserves the delicate peppermint flavor, which can be lost at higher heat. Try a temperature test by baking a single cookie first.
Why Your Nose Knows Best
The aroma of the cookies is a reliable indicator of doneness. When the scent of vanilla and peppermint rises, the cookies are nearly ready. If the smell is too sweet, they need a couple more minutes. Trust your nose; it’s a seasoned judge.
The 5-Minute Rest That Changes Everything
Letting the cookies rest on the baking sheet for 5 minutes before transferring to a rack is essential. This short pause allows the structure to set, preventing the cookies from crumbling. It also gives the chocolate a chance to firm up slightly. The rest is small but crucial.
The Sweet‑and‑Salty Balance
If you prefer a less sweet cookie, reduce the granulated sugar by a quarter cup. The brown sugar will still provide moisture and caramel notes. The salt will become more pronounced, so increase it by a pinch. This tweak can transform the cookie into a more sophisticated palate.
The Crunch Factor
Adding extra crushed peppermint candies after baking gives a satisfying crunch that stays crunchy. Sprinkle them on top of the warm cookies before they set. The candy’s sugar will caramelize slightly, creating a sweet, minty crunch that lingers. This is a simple yet effective upgrade.
Creative Twists and Variations
This recipe is a playground. Here are some of my favorite ways to switch things up:
Chocolate‑Covered Peppermint
Dip the cooled cookies in melted dark chocolate for a glossy finish. The dark chocolate adds bitterness that balances the sweetness. Let the chocolate set on parchment before serving. The result is a decadent, festive treat.
Nutty Mint Surprise
Stir in ½ cup chopped pistachios or almonds before baking. The nuts add crunch and a subtle earthy flavor. They also provide a contrast to the creamy chocolate. This variation is perfect for a holiday gift basket.
Spiced Peppermint
Add a pinch of ground ginger or cinnamon to the dry mix. The spices give warmth that complements the mint. This version feels like a holiday in a bite. Serve with a cup of chai for a cozy pairing.
Lighter, Airier Version
Replace half the butter with unsweetened applesauce. The applesauce keeps the dough moist while cutting fat. The cookies will be lighter in texture but still chewy. This is a healthier alternative without sacrificing flavor.
Mint‑Infused Glaze
Whisk powdered sugar with a splash of peppermint extract to create a glaze. Drizzle it over cooled cookies for a sweet, minty finish. The glaze adds a glossy sheen and extra sweetness. Great for a dessert table.
Storing and Bringing It Back to Life
Fridge Storage
Store cookies in an airtight container at room temperature for up to 5 days. Keep them in a single layer to prevent sticking. If you want them to stay soft, add a slice of fresh bread to the container; the bread will absorb excess moisture.
Freezer Friendly
Wrap cookies individually in plastic wrap and place them in a freezer bag. They can be stored for up to 3 months. Thaw at room temperature for 30 minutes before serving. The texture remains tender and flavorful.
Best Reheating Method
Reheat frozen cookies at 350°F (175°C) for 8–10 minutes. Add a tiny splash of water to the baking sheet to create steam, which helps the cookies stay moist. Let them cool on a rack before eating. The result is a fresh, warm treat.