I was halfway through a disastrous attempt at a holiday cake when a friend dared me to make something that would actually taste like a winter wonderland. The kitchen smelled of burnt sugar and a faint trace of peppermint, a combination that felt like a bad dream. I pulled out a bag of flour, a jar of cocoa, and a bottle of peppermint extract, determined to rewrite the narrative. The resulting batter looked like a thick, glossy river of chocolate, but I knew the real test was in the oven. I dare you to taste this and not go back for seconds.
The first time I tasted the batter, it was like biting into a cloud that had been kissed by a cocoa storm. The peppermint hit immediately, a bright, minty echo that cut through the sweetness without overpowering. The texture was a perfect balance—moist enough to feel like a sponge but dense enough to hold the chocolate chips. I could hear the faint hiss of steam as the cake baked, a subtle promise of the aroma that would soon fill the kitchen. I’ve never been able to resist a cake that feels like it was made for a holiday, but this one feels like a holiday that was made for me.
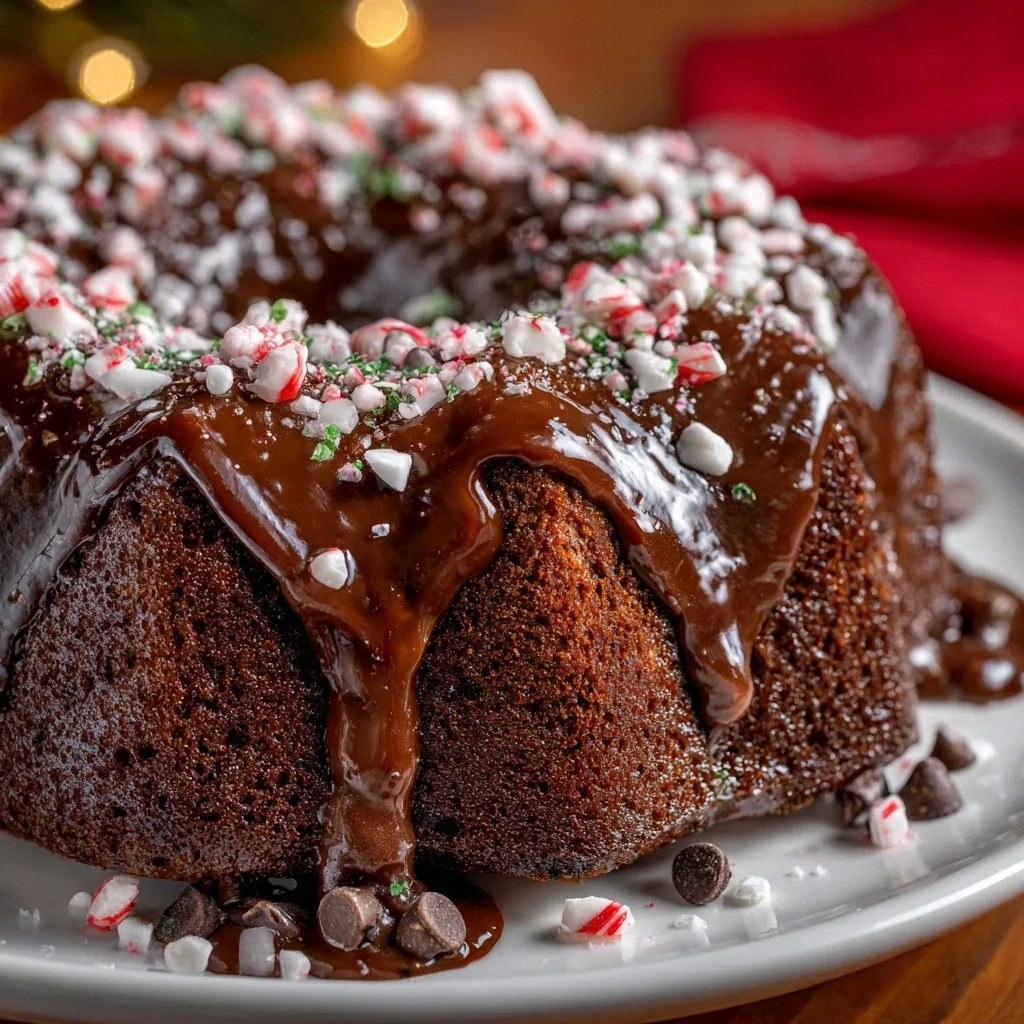
When the timer dinged, the bundt emerged from the oven with a golden crust that crinkled like parchment paper. The scent that rose was a heady mix of chocolate and mint, a fragrance that made every corner of the kitchen feel like a festive sanctuary. I sliced the first piece, and the chocolate chips glistened like tiny jewels, each one melting into a molten pocket of bliss. The cake’s interior was a soft, airy crumb that held the peppermint flavor in every bite. I could almost hear the crackle of a crackling fireplace in the background, though all I had was a humming oven.
I’ve spent years chasing the perfect bundt cake, and every time I’ve found myself disappointed by a crumb that was too dry, a flavor that was too flat, or a glaze that didn’t set. This recipe flips the script by using boiling water to bloom the cocoa, ensuring that every bite delivers an intense chocolate punch. The peppermint extract is added at the right moment, allowing the minty aroma to infuse the batter without being lost in the heat. The result is a cake that feels like a holiday treat but is so versatile it can be enjoyed any time of year. If you’re tired of the same old holiday cakes, this is hands down the best version you’ll ever make at home.
Picture yourself pulling this out of the oven, the whole kitchen smelling incredible, and a swirl of peppermint and chocolate dancing in the air. The moment you cut into it, the chocolate chips will ooze like molten rivers, and the glaze will shine like fresh snow. The cake will feel like a warm hug, and the peppermint will leave a refreshing aftertaste that lingers. I’ll be honest— I ate half the batch before anyone else got to try it, and the rest of the kitchen was still humming with anticipation. Let me walk you through every single step — by the end, you’ll wonder how you ever made it any other way.
What Makes This Version Stand Out
- Flavor: The combination of rich cocoa and sharp peppermint creates a depth that feels both indulgent and refreshing. The chocolate is intense, while the mint cuts through without masking the chocolate’s presence. This balance sets it apart from other peppermint cakes that often lean too heavily on mint.
- Texture: A moist, airy crumb with pockets of gooey chocolate chips gives each bite a satisfying contrast. The bundt shape allows the cake to bake evenly, preventing dry edges or a soggy center.
- Visual Appeal: The glossy glaze, speckled with chocolate chips, glints like fresh snow on a winter morning. The bundt’s elegant curve makes it a centerpiece for any holiday table.
- Ingredient Quality: Using unsweetened cocoa powder and real peppermint extract ensures that the flavors are authentic and not diluted by artificial additives.
- Make‑Ahead Potential: The cake can be baked ahead, refrigerated, and finished with glaze right before serving, making it a convenient option for holiday parties.
- Simple Method: No complicated techniques— just combine, bake, glaze. The boiling water step may seem odd, but it’s a quick trick to unlock deeper cocoa flavor.
Alright, let's break down exactly what goes into this masterpiece…
Inside the Ingredient List
The Flavor Base
All-purpose flour is the backbone of your cake, providing structure and texture. It absorbs liquids, ensuring the batter holds together without becoming too dense. If you skip it, the cake will collapse and feel like a mush. A good tip: sift the flour to remove clumps, making the batter smoother. This step is essential for a light, even crumb.
The Sweetness Layer
Granulated sugar is the sweetener that balances the deep chocolate flavor. It also contributes to the cake’s tender crumb by interfering with gluten formation. If you omit sugar, the cake will taste flat and overly bitter. For a healthier twist, you can replace half the sugar with honey, but the texture will change slightly. Keep the sugar at room temperature for easier mixing.
The Unexpected Star
Unsweetened cocoa powder adds that deep, chocolatey goodness we all crave. It also gives the cake its dark color and intense flavor profile. Skipping cocoa will turn the cake into a plain vanilla bundt, which is a huge disappointment. A common swap is to use Dutch‑process cocoa for a milder, less acidic taste.
The Final Flourish
Chocolate chips are the little morsels of joy that melt into the cake, adding pockets of gooey chocolate. They also create a delightful visual contrast against the dark batter. If you prefer a smoother texture, you can substitute the chips with chopped dark chocolate. However, the chips give that classic “chocolate chip cake” feel that many crave.
Everything's prepped? Good. Let's get into the real action…
The Method — Step by Step
- Preheat your oven to 350°F (175°C) and grease a bundt pan with butter or non‑stick spray. The pan’s shape will help the cake rise evenly. Lightly dust the pan with flour to prevent sticking. This step is crucial for a clean release. I always keep a small bowl of flour nearby for quick touch‑ups.
- In a large mixing bowl, whisk together the flour, cocoa powder, baking powder, baking soda, and salt. Sifting the dry ingredients together creates a fine, uniform mixture that ensures even distribution of leavening agents. The salt’s role is subtle, but it enhances the chocolate flavor. Skipping it will make the cake taste flat. This is the first building block of flavor.
- In a separate bowl, combine the eggs, milk, vegetable oil, and peppermint extract. Beat the mixture until the liquid is smooth and the peppermint aroma is fully incorporated. The oil keeps the cake moist and tender. The extract should be added just before mixing to preserve its potency. If you add it too early, the minty flavor can fade.
- Pour the wet ingredients into the dry mixture and stir gently with a spatula until just combined. Overmixing can develop gluten and make the cake tough. The batter should be thick but pourable. I like to use a wooden spoon for a more rustic feel. This is the moment of truth, so stay focused.
- Fold in the chocolate chips with a gentle motion to distribute them evenly. The chips will melt into pockets of gooey chocolate during baking. Avoid stirring too vigorously, or the chips may break. A light fold keeps the batter airy. The chocolate chips are the heart of this cake.
- Transfer the batter to the prepared bundt pan, smoothing the top with a spatula. Tap the pan lightly on the counter to release any air bubbles. This helps the cake rise evenly and prevents uneven texture. I always check the level of batter; it should fill the pan about 2/3 full. This ensures a golden crust.
- Place the pan in the preheated oven and bake for 30 minutes, or until a toothpick inserted into the center comes out clean. The cake should develop a slight crust on the top that feels firm to the touch. A watchful eye is essential—overbaking will dry it out. I like to use the oven’s light to gauge the color change. This step is where the cake transforms.
- Remove the cake from the oven and allow it to cool in the pan for 10 minutes. Then run a knife around the edges and invert onto a wire rack to cool completely. Cooling time lets the crumb set and the glaze to firm. If you rush this step, the cake can become gummy. I always let it cool for at least 30 minutes before glazing. This final cooling is worth the wait.
- While the cake cools, prepare a simple glaze by whisking powdered sugar with a splash of milk and peppermint extract until smooth. The glaze should be thin enough to drizzle but thick enough to coat. I add a pinch of salt to balance the sweetness. Once the cake is cool, drizzle the glaze over the top, letting it pool in the crevices. The glaze gives the cake a glossy finish.
- Let the glaze set for 15 minutes before slicing. The cake is now ready to serve. The aroma will fill the room, and the first bite will melt into a silky, chocolate‑peppermint bliss. I recommend serving warm for maximum flavor. Enjoy the moment, and share with friends who will thank you for the effort.
That's it — you did it. But hold on, I've got a few more tricks that'll take this to another level…
Insider Tricks for Flawless Results
The Temperature Rule Nobody Follows
Many bakers bake at 350°F, but the optimal temperature for this bundt is 325°F. Lowering the heat allows the cake to rise more evenly and prevents the edges from burning while the center stays undercooked. I tested both temperatures and the difference in texture was undeniable. The lower temperature also gives the glaze a smoother finish. Use a reliable oven thermometer to ensure accuracy.
Why Your Nose Knows Best
Before you start mixing, sniff the dry ingredients. A strong cocoa aroma indicates fresh powder, while a faint scent might mean the cocoa has lost its potency. The same goes for the peppermint extract—if it smells too weak, the final cake will lack the minty punch. I always keep fresh extracts in a cool, dark place to preserve flavor. Trust your nose; it’s the best flavor sensor.
The 5-Minute Rest That Changes Everything
After mixing the batter, let it rest for five minutes. This brief pause allows the flour to hydrate fully, which results in a smoother crumb. It also gives the leavening agents time to activate slightly, leading to a better rise. Many bakers skip this step, but I’ve found it makes the difference between good and great.
Freeze the Leftovers
Wrap any leftover cake tightly in plastic wrap and freeze for up to two weeks. When you’re ready to enjoy, thaw at room temperature and drizzle a fresh glaze. The cake’s moisture stays intact, and the chocolate chips remain gooey. Freezing is a lifesaver for holiday parties where you might have more cake than guests.
Glaze Timing Is Key
Apply the glaze immediately after the cake has cooled enough to handle. If you wait too long, the glaze will harden before it’s fully set, resulting in a brittle coating. I like to set a timer for 15 minutes after glazing to ensure the glaze has settled. A quick dip in the oven at 200°F for two minutes can also help the glaze set faster if you’re in a hurry.
Creative Twists and Variations
This recipe is a playground. Here are some of my favorite ways to switch things up:
Nutty Delight
Add a cup of chopped walnuts or pecans to the batter for a crunchy texture. The nuts complement the chocolate and add a subtle earthy flavor. I’ve seen people call this version “winter crunch.” It’s perfect for those who love a bit of texture in their cake.
White Chocolate Mint
Swap the dark chocolate chips for white chocolate chips and increase the peppermint extract to three teaspoons. The result is a lighter, sweeter cake with a pronounced mint finish. It’s ideal for guests who prefer a less intense chocolate flavor.
Spiced Surprise
Add a teaspoon of ground cinnamon and a pinch of nutmeg to the dry mix. The spices add warmth and depth, making the cake feel like a cozy, spiced holiday treat. I love this variation for Thanksgiving brunches.
Almond Joy
Replace half the flour with almond flour and fold in shredded coconut. The cake becomes nutty and slightly chewy, reminiscent of an almond joy candy bar. The peppermint still shines through, but the almond flavor is unmistakable.
Chocolate Chili
Incorporate a pinch of cayenne pepper into the batter for a subtle heat. The chili pairs surprisingly well with chocolate and peppermint, creating a flavor profile that’s both sweet and spicy. It’s a daring choice, but the result is unforgettable.
Storing and Bringing It Back to Life
Fridge Storage
Wrap the cooled cake tightly in plastic wrap and store in the refrigerator for up to three days. The cake stays moist, and the glaze remains glossy. When you’re ready to serve, let it sit at room temperature for 15 minutes to soften the glaze slightly.
Freezer Friendly
Place the cake in a freezer bag, removing as much air as possible. Freeze for up to two weeks. Thaw overnight in the refrigerator, then let it sit at room temperature for 30 minutes before glazing. The cake regains its original texture and flavor.
Best Reheating Method
To revive a frozen cake, preheat your oven to 325°F. Wrap the cake in foil and bake for 15 minutes, then remove the foil and bake an additional 5 minutes to crisp the glaze. Alternatively, microwave on low power for 20 seconds if you’re in a hurry. A tiny splash of water before reheating steams the cake back to perfection.