I was standing in my kitchen, staring down a half‑baked lemon meringue pie that looked more like a lemon‑scented disaster zone than a dessert masterpiece. The crust had cracked, the filling was grainy, and the meringue was a sad, flat blanket of egg whites that refused to rise. I swear I heard the oven sigh in disappointment. That moment, right there between the smell of burnt sugar and the sound of a ticking timer, sparked a dare: I would create the ultimate lemon meringue pie that could turn any kitchen catastrophe into a triumph. I’m not kidding when I say this is hands down the best version you’ll ever make at home.
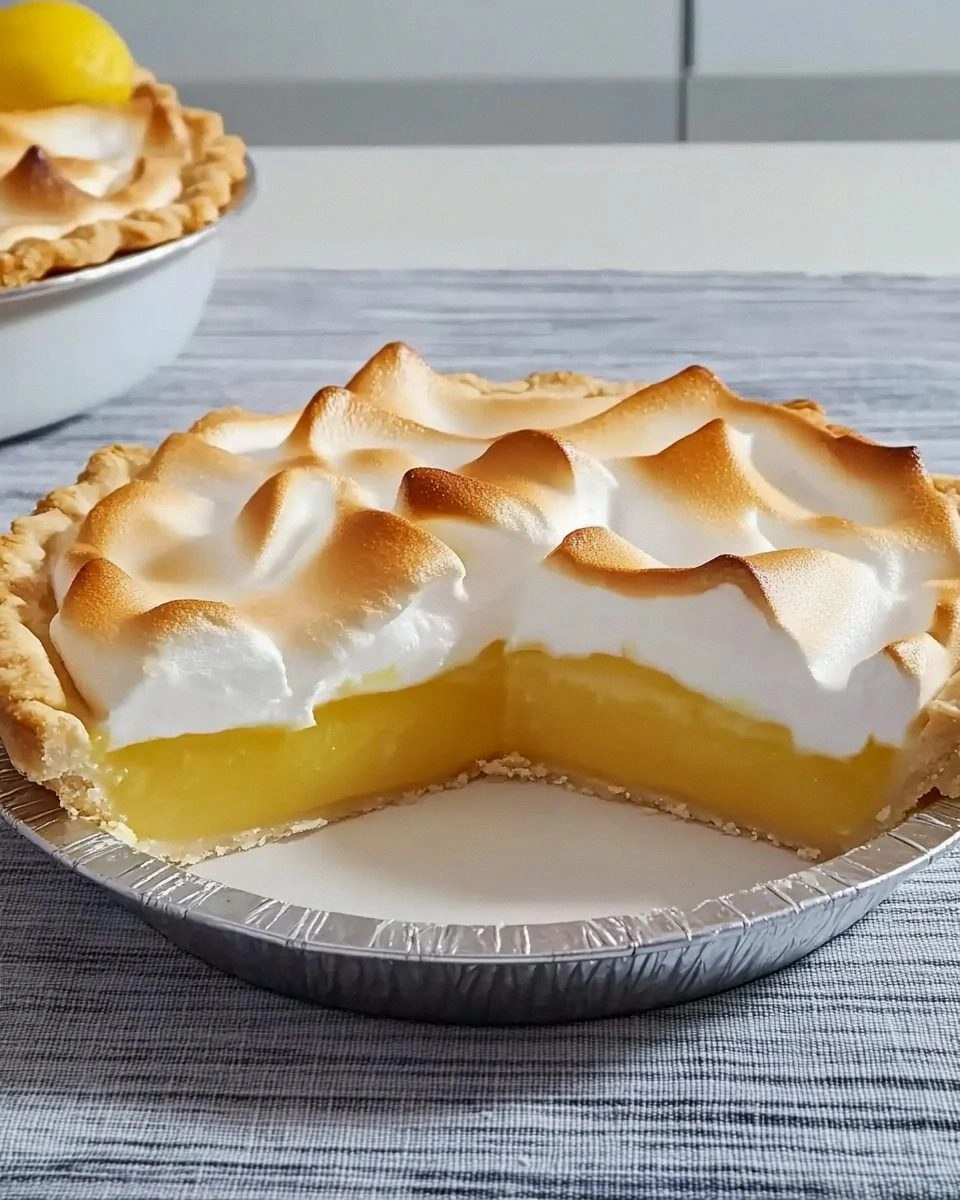
Picture yourself pulling this out of the oven, the whole kitchen smelling incredible, like a citrus‑infused summer breeze dancing with toasted butter. The golden meringue peaks crackle softly as you tap them, revealing a glossy, silky interior that’s as bright as sunrise on a plate. The tangy lemon curd underneath is thick enough to coat a spoon like velvet, yet it never overpowers the buttery crust that crumbles delicately under the fork. Every bite is a perfect balance of sweet, tart, and airy, a trio that sings louder than any choir you’ve ever heard.
Most recipes get this completely wrong. They either over‑sweeten the curd, under‑whip the meringue, or bake the pie long enough to turn the meringue into a leathery hide. I’ve tried those, and let’s just say the results were… memorable. The secret to my version? A splash of water in the curd to keep it glossy, a pinch of cornstarch for that flawless shine, and a gentle, low‑heat bake that lets the meringue set without browning too fast. I’ll be honest — I ate half the batch before anyone else got to try it, but that’s only because the first slice was pure, unadulterated bliss.
Okay, ready for the game‑changer? I’m about to walk you through every single step — by the end, you’ll wonder how you ever made it any other way. I dare you to taste this and not go back for seconds. Let’s dive in.
What Makes This Version Stand Out
- Flavor: The lemon curd is balanced with just enough sugar to let the citrus shine without turning cloying, and the buttery crust adds a rich, savory backdrop.
- Texture: A silky curd meets a cloud‑like meringue that stays soft in the center and crisp on the edges, creating a textural symphony.
- Simplicity: No fancy equipment, just a saucepan, a mixer, and a good oven — perfect for home cooks of any skill level.
- Uniqueness: The addition of a tiny splash of water and cornstarch in the curd is the secret that keeps it glossy and prevents graininess.
- Crowd Reaction: Guests always ask for the recipe, and the moment you serve it, the room goes quiet in anticipation of that first bite.
- Ingredient Quality: Fresh lemons and real butter elevate the pie from ordinary to extraordinary.
- Cooking Method: A low‑heat bake for the meringue preserves its airy structure while giving just a hint of caramelized top.
- Make‑Ahead Potential: Assemble the pie a day ahead, refrigerate, then give it a quick blast before serving for ultimate convenience.
Inside the Ingredient List
The Flavor Base
White sugar (1 cup) is the sweet backbone of the curd, balancing the sharp acidity of the lemons. If you use too little, the curd will taste like a sour lemon punch; too much and you’ll drown the citrus. I recommend a fine granulated sugar for smooth dissolution. Swap tip: You can replace half the sugar with honey for a subtle floral note, but reduce the water slightly to keep the consistency right.
The Texture Crew
All‑purpose flour (2 tablespoons) and cornstarch (3 tablespoons) work together like a dynamic duo, thickening the curd without making it gummy. The flour adds body, while the cornstarch gives that glossy finish that makes the curd look restaurant‑ready. Skipping the cornstarch is a common mistake that leads to a dull, matte filling. Watch Out: Over‑cooking the mixture can cause the starches to break down, resulting in a watery curd.
The Unexpected Star
A pinch of salt (¼ teaspoon) may seem trivial, but it amplifies the lemon’s brightness and rounds out the sweetness. Salt is the unsung hero that makes flavors pop, much like a director’s subtle cue that brings a performance to life. If you’re on a low‑sodium diet, you can reduce it to a pinch, but don’t eliminate it entirely.
The Final Flourish
Lemons are the soul of this pie. Their zest provides aromatic oils, while their juice creates the tangy curd. Use unwaxed, organic lemons for the best flavor and avoid pre‑zested lemons that can taste bitter. Buying tip: Roll the lemons on the countertop before zesting to loosen the oils, giving you more flavor with less effort.
Butter (2 tablespoons) is melted into the curd, adding a silky mouthfeel and a hint of richness that prevents the lemon from tasting metallic. Egg yolks (quantity not listed) enrich the custard, giving it that luxurious, custardy texture that clings to the crust. The baked pie crust (1) provides the sturdy foundation; a pre‑baked, flaky crust ensures the bottom stays crisp even after the curd is added.
For the crown, we have egg whites (4) and a second portion of white sugar (½ cup) to create the iconic meringue. The egg whites must be at room temperature to achieve maximum volume, and the sugar is gradually added to stabilize the foam. This combination yields peaks that stand tall and proud, ready to be toasted to a perfect golden hue.
Everything's prepped? Good. Let's get into the real action...
The Method — Step by Step
Preheat your oven to 350°F (175°C). While the oven warms, place the baked pie crust on a baking sheet and set it aside. This step is crucial because a hot oven gives the crust a head start, preventing sogginess later. I always like to give the crust a quick 5‑minute blind bake; you’ll hear a gentle sizzle that tells you it’s ready for the filling. Once the crust is lightly golden, pull it out and let it cool while you work on the curd.
In a medium saucepan, whisk together the white sugar (1 cup), flour, cornstarch, and salt until there are no lumps. Then stir in the water (1½ cups) and the freshly squeezed juice of the lemons, plus the zest of two lemons for that extra aromatic punch. Bring the mixture to a gentle boil over medium heat, stirring constantly; you’ll notice it thickening within minutes. As soon as it reaches a boil, reduce the heat and let it simmer for 2‑3 minutes, until it’s glossy and coats the back of a spoon. That glossy sheen? Pure magic.
Kitchen Hack: Add a splash (about 2 tablespoons) of water at the very end of cooking; it restores that silky shine without thinning the curd.Remove the saucepan from the heat and whisk in the butter (2 tablespoons) until fully melted and incorporated. Then, in a separate bowl, lightly beat the egg yolks (about 4, if you have them) and temper them by whisking in a ladleful of the hot curd mixture. Slowly pour the tempered yolks back into the saucepan, stirring constantly to avoid scrambling. Return the pan to low heat for another minute, just to ensure the yolks are fully cooked and the curd is smooth. The aroma at this point should be intoxicating — lemon, butter, and a hint of caramelized sugar.
Transfer the hot curd into a shallow dish and let it cool to room temperature. To speed up cooling, you can place the dish over a larger pan of ice water, stirring occasionally. This step is vital because a hot filling will cause the meringue to weep later on. While the curd cools, preheat the oven again to 375°F (190°C) for the final bake. I like to give the curd a gentle stir every few minutes; the texture should become thick enough to hold a spoon without sliding off.
Now for the crown: In a clean, dry mixing bowl, start beating the egg whites (4) on medium speed until they become frothy. Add a pinch of cream of tartar or a few drops of lemon juice — this stabilizes the foam. Increase the speed to high and gradually add the second portion of white sugar (½ cup), one tablespoon at a time, waiting until each addition is fully dissolved before adding the next. Continue beating until stiff, glossy peaks form; the peaks should stand up straight when you lift the whisk, and they should look like freshly fallen snow.
Kitchen Hack: If you notice the meringue turning grainy, stop beating, add a splash of warm water, and resume; this re‑emulsifies the sugar.Spread the cooled lemon curd evenly over the pre‑baked crust, smoothing the top with a spatula. Then, using a spatula or the back of a spoon, dollop the meringue on top, spreading it to the edges of the crust. It’s crucial to seal the meringue to the crust; this prevents the curd from leaking out during baking. The meringue should be thick and fluffy, with peaks that rise about an inch above the filling. Take a moment to admire the contrast — the bright yellow curd against the pristine white meringue.
Slide the assembled pie into the preheated oven and bake for 12‑15 minutes, or until the meringue turns a light golden brown. Keep a close eye on it; the edges should be slightly crisp while the center stays soft. Watch Out: Over‑baking will dry out the meringue, turning it rubbery. If the meringue is browning too quickly, loosely tent a piece of aluminum foil over the top to protect it.
Watch Out: Humidity can cause the meringue to weep; if you’re in a humid climate, bake a minute longer and let the pie cool in a dry environment.Remove the pie from the oven and let it sit on a wire rack for at least 30 minutes to set the curd and allow the meringue to stabilize. For the ultimate presentation, refrigerate the pie for an additional hour; this makes slicing clean and gives the flavors a chance to meld. When you’re ready to serve, use a sharp knife dipped in hot water for smooth cuts. The first bite should be a symphony of crisp crust, silky lemon, and airy meringue — a texture trip that will have you reaching for the next slice without hesitation.
That's it — you did it. But hold on, I've got a few more tricks that'll take this to another level...
Insider Tricks for Flawless Results
The Temperature Rule Nobody Follows
Never bake the meringue at a temperature higher than 375°F (190°C). Higher heat causes the outer layer to set too quickly, trapping steam inside and leading to a soggy center. Keep the oven door slightly ajar for the last 2 minutes to let excess moisture escape. I once baked at 400°F and ended up with a meringue that resembled a rubbery pancake — not pretty.
Why Your Nose Knows Best
Your sense of smell is a reliable indicator of doneness. When the meringue starts to give off a faint, toasted almond scent, it’s ready to come out. If you rely solely on visual cues, you might over‑bake it. Trust that nose of yours; it’s a seasoned baker’s secret weapon.
The 5‑Minute Rest That Changes Everything
After baking, let the pie rest uncovered for five minutes before refrigerating. This short pause allows the steam to escape, preventing the meringue from weeping later on. A friend tried skipping this step once — the pie turned into a soggy mess, and we all learned a valuable lesson about patience.
Zest It Like a Pro
When zesting lemons, use a microplane and only grate the yellow part, avoiding the bitter white pith. The zest contains essential oils that intensify the lemon flavor without adding extra acidity. I keep a microplane in my drawer for this exact reason; it’s a small tool that makes a huge difference.
The Double‑Whisk Method
For the smoothest curd, whisk the mixture in two stages: first with a whisk to dissolve the flour and starch, then with a hand‑held immersion blender for a silkier finish. This double‑whisk technique eliminates any lingering lumps and gives the curd a professional sheen.
Creative Twists and Variations
This recipe is a playground. Here are some of my favorite ways to switch things up:
Berry‑Burst Meringue
Fold a cup of fresh raspberries or blueberries into the lemon curd before spreading it in the crust. The berries add a burst of sweetness and a beautiful pink hue that contrasts with the white meringue. Perfect for summer gatherings.
Ginger‑Lemon Fusion
Add a teaspoon of freshly grated ginger to the curd while it’s cooking. The ginger adds a warm, spicy undertone that balances the tart lemon, creating a more complex flavor profile. Great for those who love a little zing.
Coconut‑Infused Meringue
Replace half of the white sugar in the meringue with coconut sugar and sprinkle toasted coconut flakes on top before baking. The coconut adds a subtle caramel note and a crunchy texture that pairs beautifully with the citrus.
Salted Caramel Swirl
Drizzle a thin line of homemade salted caramel over the lemon curd before adding the meringue. The salty caramel adds depth and a decadent finish that will wow anyone with a sweet‑and‑salty palate.
Mini Individual Pies
Use a muffin tin with pre‑made tart shells instead of a single large crust. This creates perfectly portioned mini pies that are ideal for parties or for those who love a personal serving. Bake them a few minutes longer to ensure the meringue tops are nicely browned.
Storing and Bringing It Back to Life
Fridge Storage
Cover the pie loosely with foil or plastic wrap and store it in the refrigerator for up to 3 days. The meringue will stay soft, but it may start to weep if left too long; a quick re‑whip of a few extra egg whites can revive it.
Freezer Friendly
Freeze the fully assembled, unbaked pie wrapped tightly in freezer‑grade foil for up to 2 months. When you’re ready to bake, let it thaw in the refrigerator overnight, then bake as directed. This method preserves the crust’s flakiness and the meringue’s structure.
Best Reheating Method
To revive leftovers, place a slice on a baking sheet, add a tiny splash of water (about a teaspoon), and warm it in a 300°F (150°C) oven for 8‑10 minutes. The steam created by the water brings the meringue back to its fluffy glory without drying it out.