I was halfway through a frantic weeknight dinner, juggling a pot of simmering sauce, a blinking oven timer, and a phone that kept buzzing with work emails when a craving hit me like a tidal wave. The idea of a quick, indulgent treat seemed absurd, yet the sweet, chocolatey scent that slipped through the kitchen door made me pause. I remembered the last time I had a brownie that was either a gooey mess or a dry slab, and I swore I would create something that would satisfy every chocolate lover in the room. That moment of culinary rebellion is the spark that led me to this recipe, and it’s a recipe that will turn any ordinary night into a decadent celebration.
Picture this: the oven hums like a contented cat, the air thick with the aroma of melted dark chocolate, and the sound of a spoon slicing through a silky batter. Your eyes catch the glossy sheen on the pan, the way the edges start to pull away like a freshly peeled sticker, and you can almost taste the first bite—rich, slightly bitter, with a hint of sweet undertone that lingers on the tongue. The texture is a delicate balance: a fudgy center that clings to your teeth and a crisp top that gives a satisfying crackle when you bite into it. And the best part? It’s made with only a handful of ingredients, yet each one plays a starring role, creating depth and complexity that you wouldn’t expect from a simple dessert.
What makes this version stand out is not just the quality of the chocolate, but the way every element is orchestrated to create a symphony of flavor and texture. I’ve tweaked the ratio of butter to flour to give it a buttery richness that melts in your mouth, and I’ve added cocoa powder to deepen the chocolate profile without overpowering it. The result is a brownie that is fudgy and dense, yet airy enough to crumble softly when you cut into it. It’s the kind of brownie that makes you question why you ever settled for mediocre chocolate treats. I dare you to taste this and not go back for seconds.
I’ll be honest—after I baked the first batch, I ate half the cake before anyone else even had a chance to try it. But that was the price of perfection. The secret sauce? A precise balance of heat and timing, and a small but mighty trick that most recipes overlook. Most recipes get this completely wrong. Here’s what actually works: a gentle melt, a quick fold, and a brief, high-heat finish that locks in the flavor. Picture yourself pulling this out of the oven, the whole kitchen smelling incredible, and the moment when the first bite melts into a chocolatey dream. Let me walk you through every single step—by the end, you’ll wonder how you ever made it any other way.
What Makes This Version Stand Out
- Flavor: The combination of dark chocolate chips and cocoa powder creates a depth that’s both bitter and sweet, with a lingering finish that keeps you coming back for more.
- Texture: The batter’s ratio of butter to flour yields a fudgy center that clings to your teeth while the edges remain slightly crisp, offering a delightful contrast.
- Simplicity: With only eight ingredients, this recipe is a no-fuss, high-reward experience that anyone can master.
- Uniqueness: The addition of a small amount of vanilla extract and the precise melting technique give this brownie a signature taste that sets it apart.
- Crowd Reaction: Friends and family always ask for the recipe after tasting these brownies, and they’re never disappointed.
- Ingredient Quality: Using high‑grade dark chocolate chips ensures a richer flavor profile that elevates the entire dessert.
- Cooking Method: A quick, low‑heat melt followed by a brief high‑heat finish locks in moisture and flavor without overcooking.
- Make‑Ahead Potential: These brownies hold up beautifully for up to a week in the fridge, and they’re even better after a day or two.
Alright, let’s break down exactly what goes into this masterpiece…
Inside the Ingredient List
The Flavor Base
Dark chocolate chips are the heart of this recipe. They provide a robust, slightly bitter flavor that contrasts beautifully with the sweetness of the sugar. If you skip them, you lose that deep chocolate core that makes the brownies unforgettable. For a richer taste, choose 70% cacao chips. They also give the brownies a slightly darker, more indulgent appearance.
The Texture Crew
Unsalted butter is the backbone of the batter’s mouthfeel. It melts into the mixture, creating a buttery richness that makes each bite feel luxurious. The ratio of butter to flour is carefully balanced to keep the brownies fudgy yet not greasy. If you’re looking for a lighter version, reduce the butter by 25% and replace it with an equal amount of melted coconut oil. That swap will give you a slightly tropical nuance without compromising the texture.
The Unexpected Star
Unsweetened cocoa powder is the secret weapon that deepens the chocolate flavor without adding extra sweetness. It also helps to bind the batter together, giving the brownies a more cohesive structure. If you don’t have cocoa powder on hand, you can use an equal amount of espresso powder for an extra coffee kick that pairs well with chocolate.
The Final Flourish
Pure vanilla extract is the subtle enhancer that rounds out the flavor profile. A half teaspoon is enough to elevate the chocolate without overpowering it. If you’re vegan, a splash of almond milk vanilla extract works beautifully. Powdered sugar is used only for dusting; it adds a light sweetness that contrasts with the rich, dark interior.
Everything’s prepped? Good. Let’s get into the real action…
The Method — Step by Step
- Step 1: Preheat your oven to 350°F (175°C). While the oven warms, line a 9x9-inch baking pan with parchment paper, leaving a little overhang on the sides. This will make removal a breeze and ensure the brownies don’t stick. The aroma of warm parchment is the first hint that something delicious is about to happen.
- Step 2: In a heat‑proof bowl, melt the butter and dark chocolate chips together. Use a microwave on 70% power for 20-second bursts, stirring after each burst until smooth. This method keeps the chocolate from scorching and preserves its silky texture. Watch the mixture transform from a chunky heap to a glossy, velvety pool—this is the moment of pure chocolate magic.
- Step 3: Whisk the eggs into the chocolate mixture until fully incorporated. The eggs bind the batter, adding structure and a slight lift. If you’re nervous about over‑whisking, stop when the mixture looks glossy and no longer has visible yolks. The batter should feel smooth and slightly thick.
- Step 4: Sift together the flour, cocoa powder, and a pinch of salt. Gradually stir this dry mixture into the wet batter, folding until just combined. The batter should be thick but pourable. Watch for the first hint of a golden crust forming at the edges—this indicates the brownies are nearing perfection.
- Step 5: Stir in the vanilla extract. This subtle hint lifts the chocolate’s depth without overpowering it. The aroma should be sweet and inviting.
- Step 6: Pour the batter into the prepared pan, smoothing the top with a spatula. Tap the pan gently on the counter to release any air bubbles. The batter should spread evenly, forming a uniform layer.
- Step 7: Bake for 25–30 minutes, or until a toothpick inserted near the center comes out with a few moist crumbs. The edges should pull away from the pan, and the center should feel slightly springy. Do not overbake—this keeps the brownies fudgy.
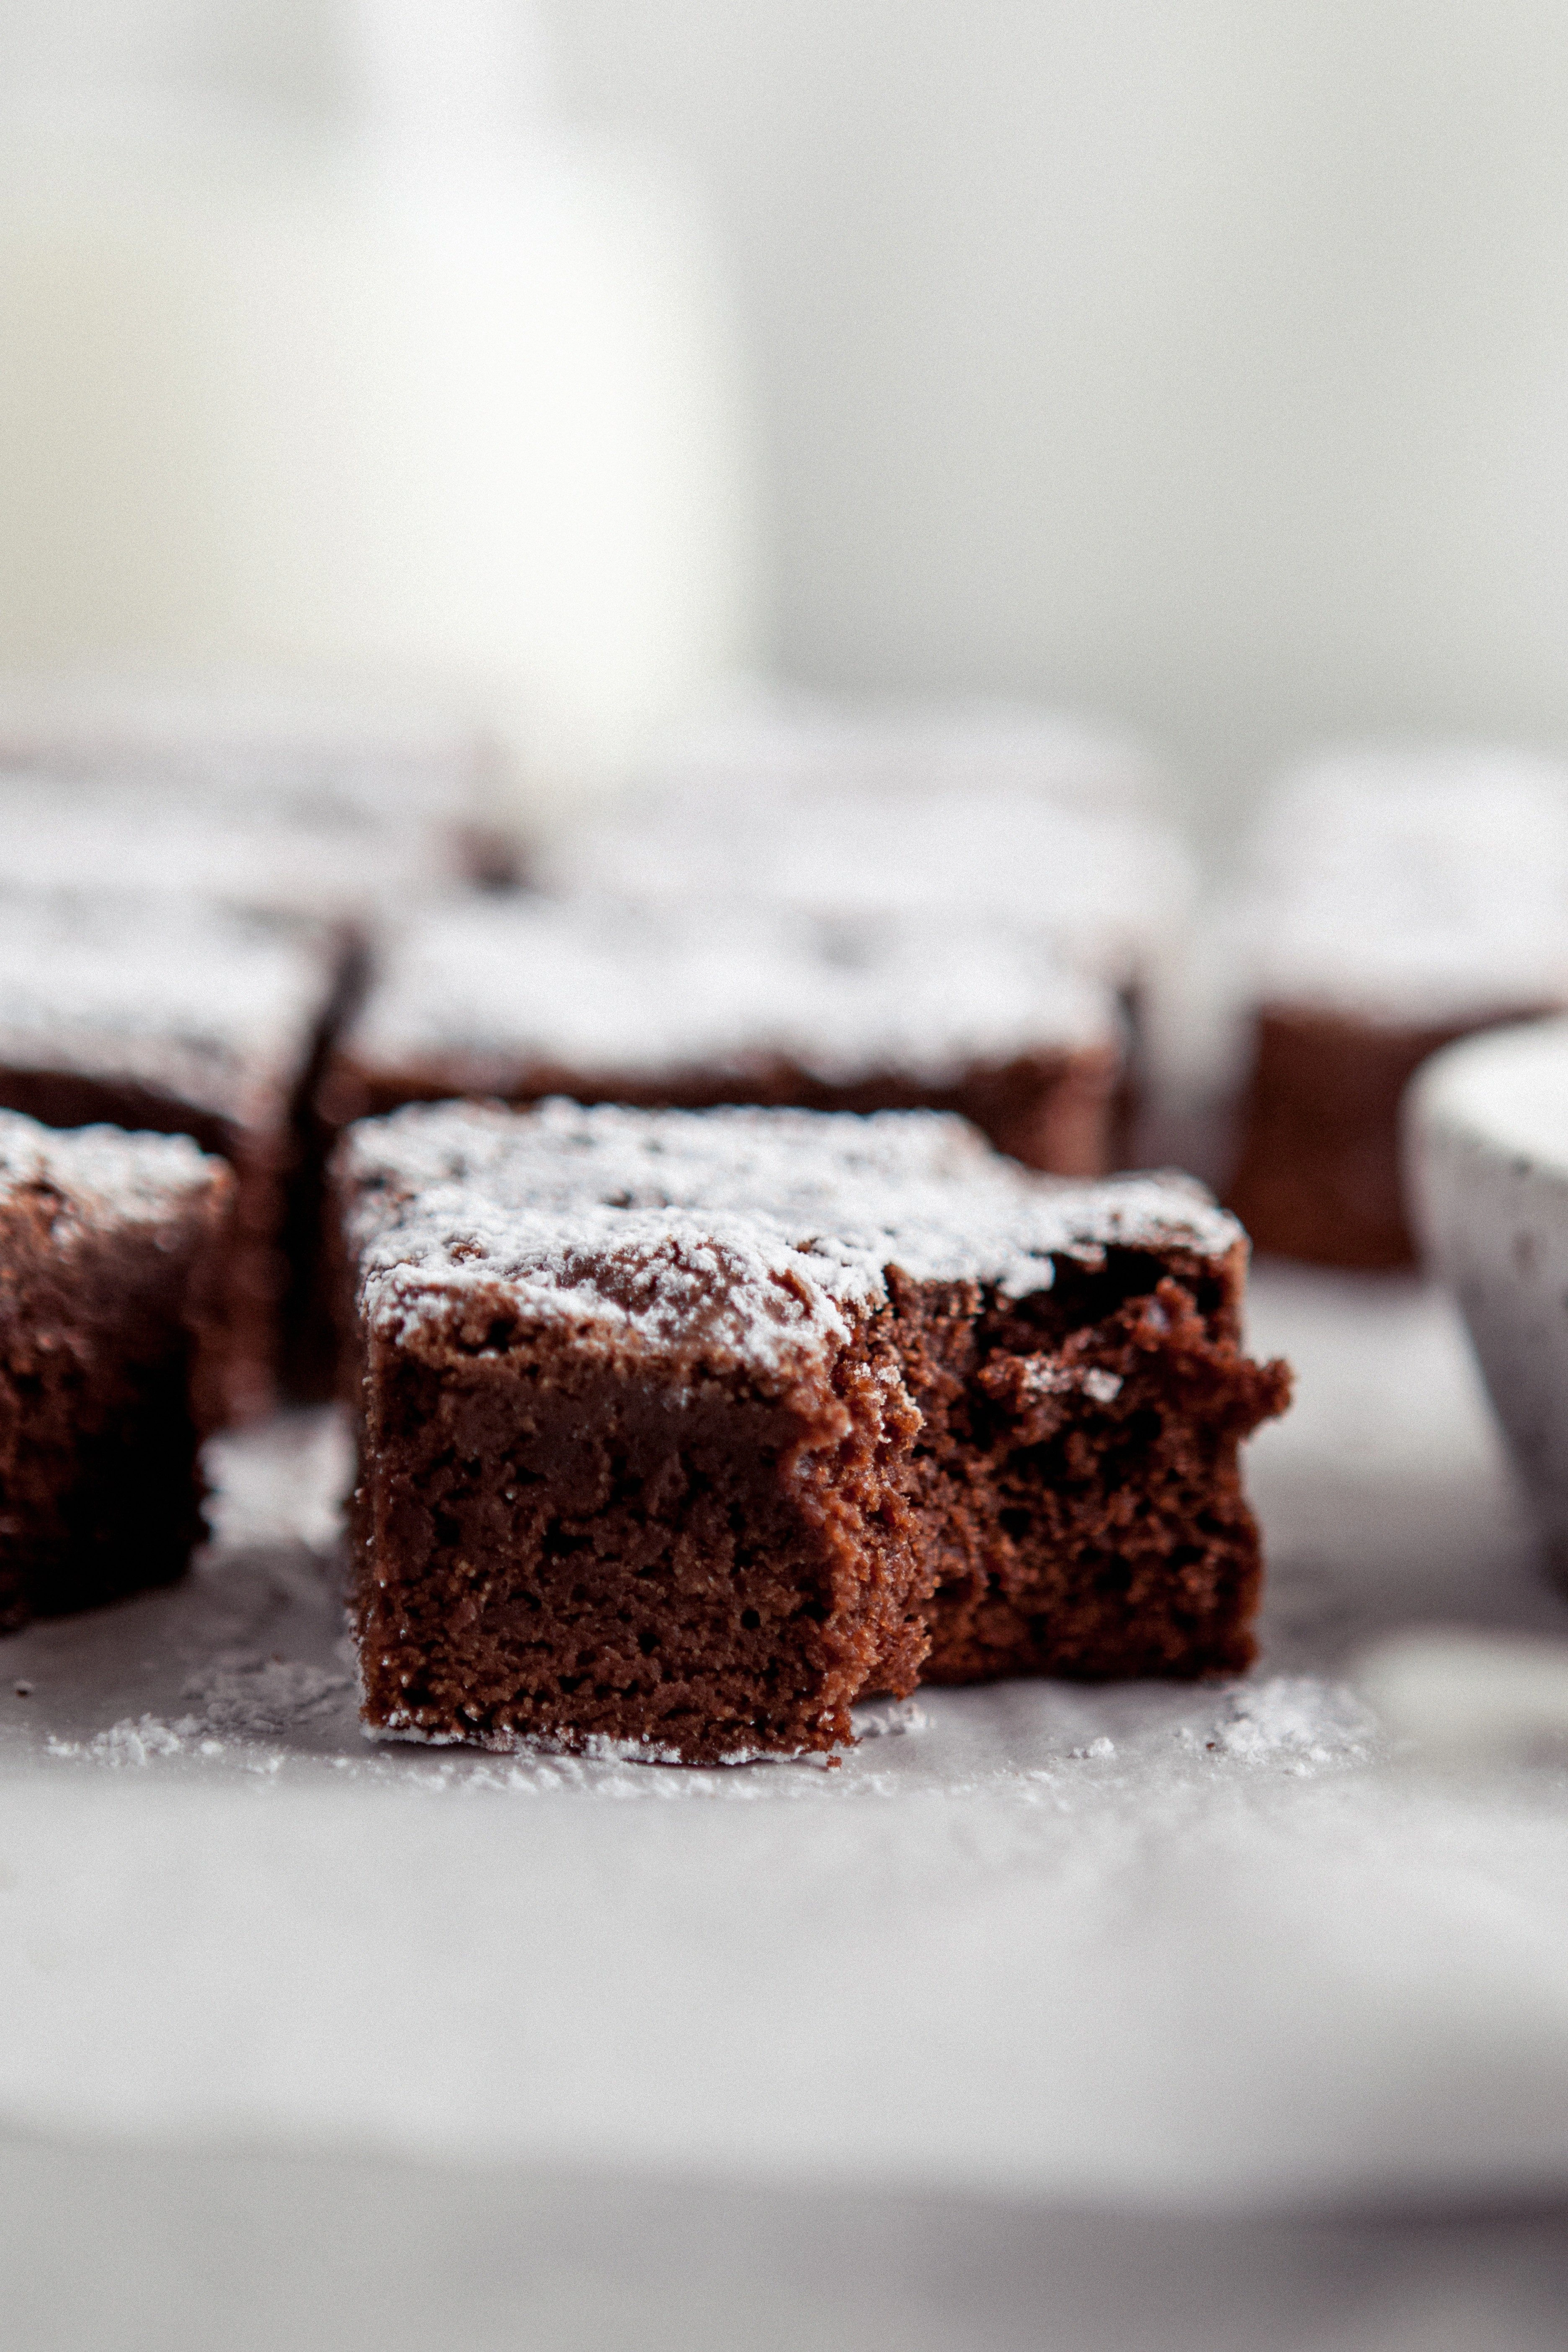
- Step 8: Remove the pan from the oven and let the brownies cool in the pan for 10 minutes. Then lift them out using the parchment overhang and transfer to a wire rack to cool completely. Once cooled, dust with powdered sugar and cut into squares. The final result is a brownie that looks as indulgent as it tastes.
That’s it — you did it. But hold on, I’ve got a few more tricks that will take this to another level.
Insider Tricks for Flawless Results
The Temperature Rule Nobody Follows
Most bakers bake brownies at a high temperature for a short time, but this recipe thrives at a lower heat for a longer duration. Baking at 350°F allows the chocolate to melt evenly and the batter to set slowly, giving a fudgy center and a crisp top. I once tried 375°F and the result was a rubbery interior. Stick to 350°F for the best texture.
Why Your Nose Knows Best
The scent of chocolate melting is a reliable indicator of doneness. When the aroma becomes rich and buttery, the brownies are almost ready. If you’re unsure, perform the toothpick test. A slightly moist crumb means you’re in the sweet spot. Trust your nose—it’s a seasoned judge.
The 5-Minute Rest That Changes Everything
After removing from the oven, let the brownies sit for exactly five minutes before lifting them out. This short rest allows the interior to set and prevents the brownies from cracking or sticking. I once skipped this step and the brownies were fragile. Give them that brief pause and the outcome will be flawless.
Keep the Chocolate Intact
When melting the chocolate, avoid stirring too aggressively. A gentle fold preserves the chocolate’s silky structure. If you stir too hard, you’ll introduce air and the brownies may rise unevenly. Keep it smooth and let the chocolate coat the batter evenly.
The Secret to a Crispy Top
If you want a crispier top, place the baking pan on a preheated baking sheet and bake for the last two minutes. The direct heat from the sheet crisps the surface without affecting the interior. I use this trick when serving a crowd; it adds a delightful crunch that contrasts with the fudgy center.
Creative Twists and Variations
This recipe is a playground. Here are some of my favorite ways to switch things up:
Nutty Explosion
Add 1/2 cup of chopped walnuts or pecans to the batter. The nuts add crunch and a buttery depth that complements the chocolate. They’re perfect for those who love a little texture in their dessert.
Spiced Surprise
Stir in 1 teaspoon of ground cinnamon or a pinch of cayenne pepper. The cinnamon brings warmth, while the cayenne adds a subtle heat that pairs surprisingly well with dark chocolate. This variation is great for those who like a little kick.
Minty Freshness
Replace half of the vanilla extract with peppermint extract. The minty aroma and flavor give the brownies a refreshing twist, especially during summer parties. Just be careful not to overdo it—mint can overpower chocolate.
Coffee Boost
Add 1 tablespoon of instant espresso powder to the dry mix. The coffee deepens the chocolate flavor and gives the brownies a subtle, sophisticated undertone. Coffee lovers will appreciate this subtle enhancement.
Vegan Version
Swap the butter for coconut oil, use flax eggs (1 tablespoon ground flaxseed mixed with 3 tablespoons water per egg), and replace dairy sugar with a plant‑based alternative. The texture will be slightly denser, but the flavor remains indulgent and chocolatey.
Cheesecake Layer
After the brownies cool, spread a thin layer of cream cheese frosting on top. Chill for 10 minutes before slicing. The tangy cream cheese balances the richness of the chocolate, creating a decadent double‑layer treat.
Storing and Bringing It Back to Life
Fridge Storage
Store brownies in an airtight container at room temperature for up to 4 days. If you prefer them warm, let them sit at room temperature for 15 minutes before serving. The airtight container keeps them from drying out.
Freezer Friendly
Wrap brownies individually in plastic wrap, then place them in a freezer bag. They’ll stay fresh for up to 3 months. When you’re ready to enjoy, let them thaw at room temperature for 30 minutes.
Best Reheating Method
Reheat brownies in a preheated oven at 300°F (150°C) for 5–7 minutes. Add a tiny splash of water to the bottom of the pan before reheating—this steams the brownies back to perfection, restoring their fudgy center and soft crust.