I was standing in my kitchen, surrounded by a mountain of flour and a recipe that smelled like disappointment. The last time I tried to make a chocolate eclair, the batter exploded into a sticky mess that clung to the ceiling like a bad dream. My friends called it a culinary catastrophe, and I was determined to rewrite that narrative. I stared at the box of graham crackers, thinking of crisp, buttery shards that could be turned into something extraordinary. I imagined a dessert that would make even the most skeptical taste buds swoon. And that’s when the idea hit me like a bolt of chocolate lightning.
Picture this: the kitchen is humming with anticipation, the air thick with the aroma of toasted crackers and vanilla. The sound of a whisk slicing through the air is a metronome for the senses. The sight of a glossy chocolate sauce glistening on a plate is a promise of indulgence. The feel of the cool glass bowl in your hand is a prelude to a silky texture that will melt on your tongue. The taste that awaits is a harmony of sweet, crunchy, and velvety notes that dance together. The experience is a symphony of flavor that feels like a hug from the inside out.
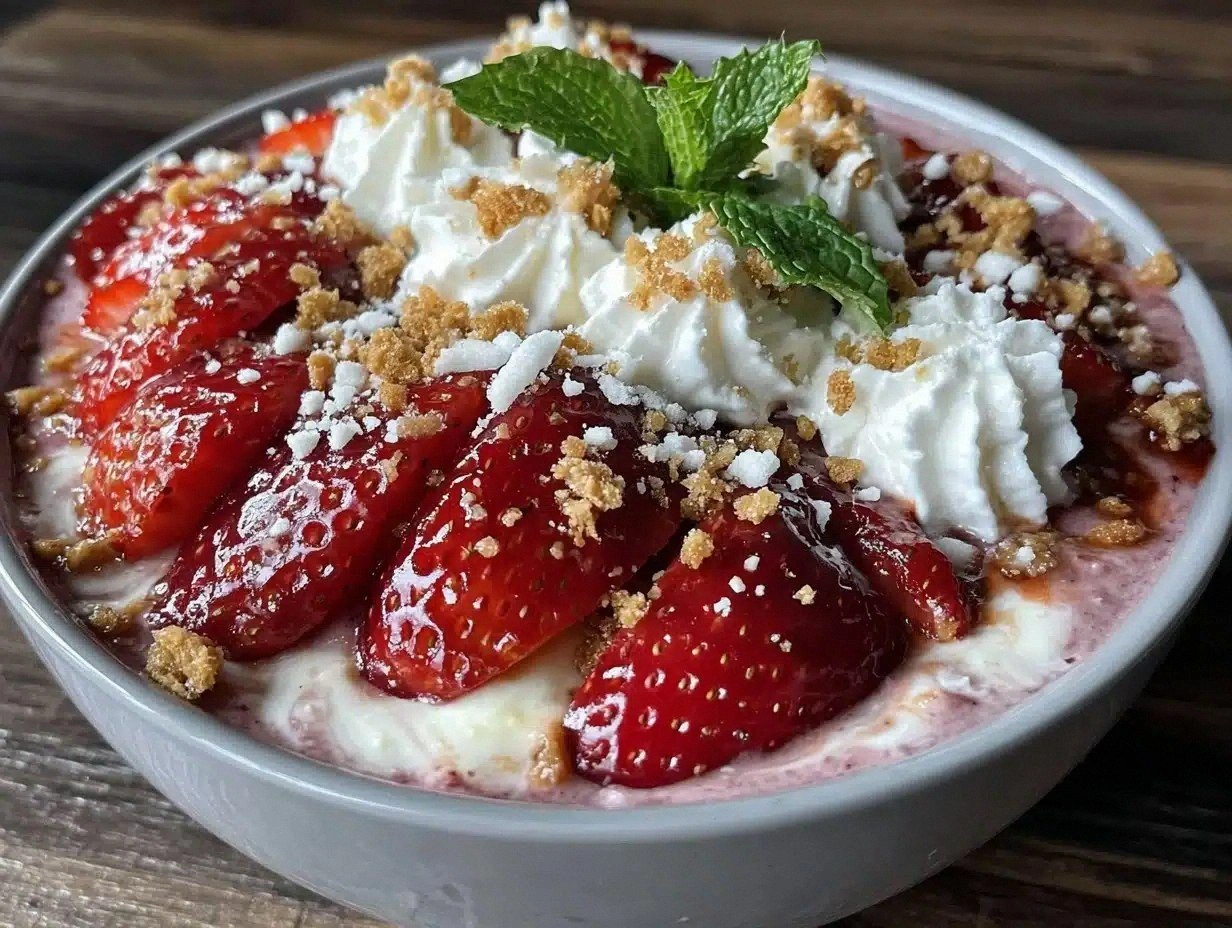
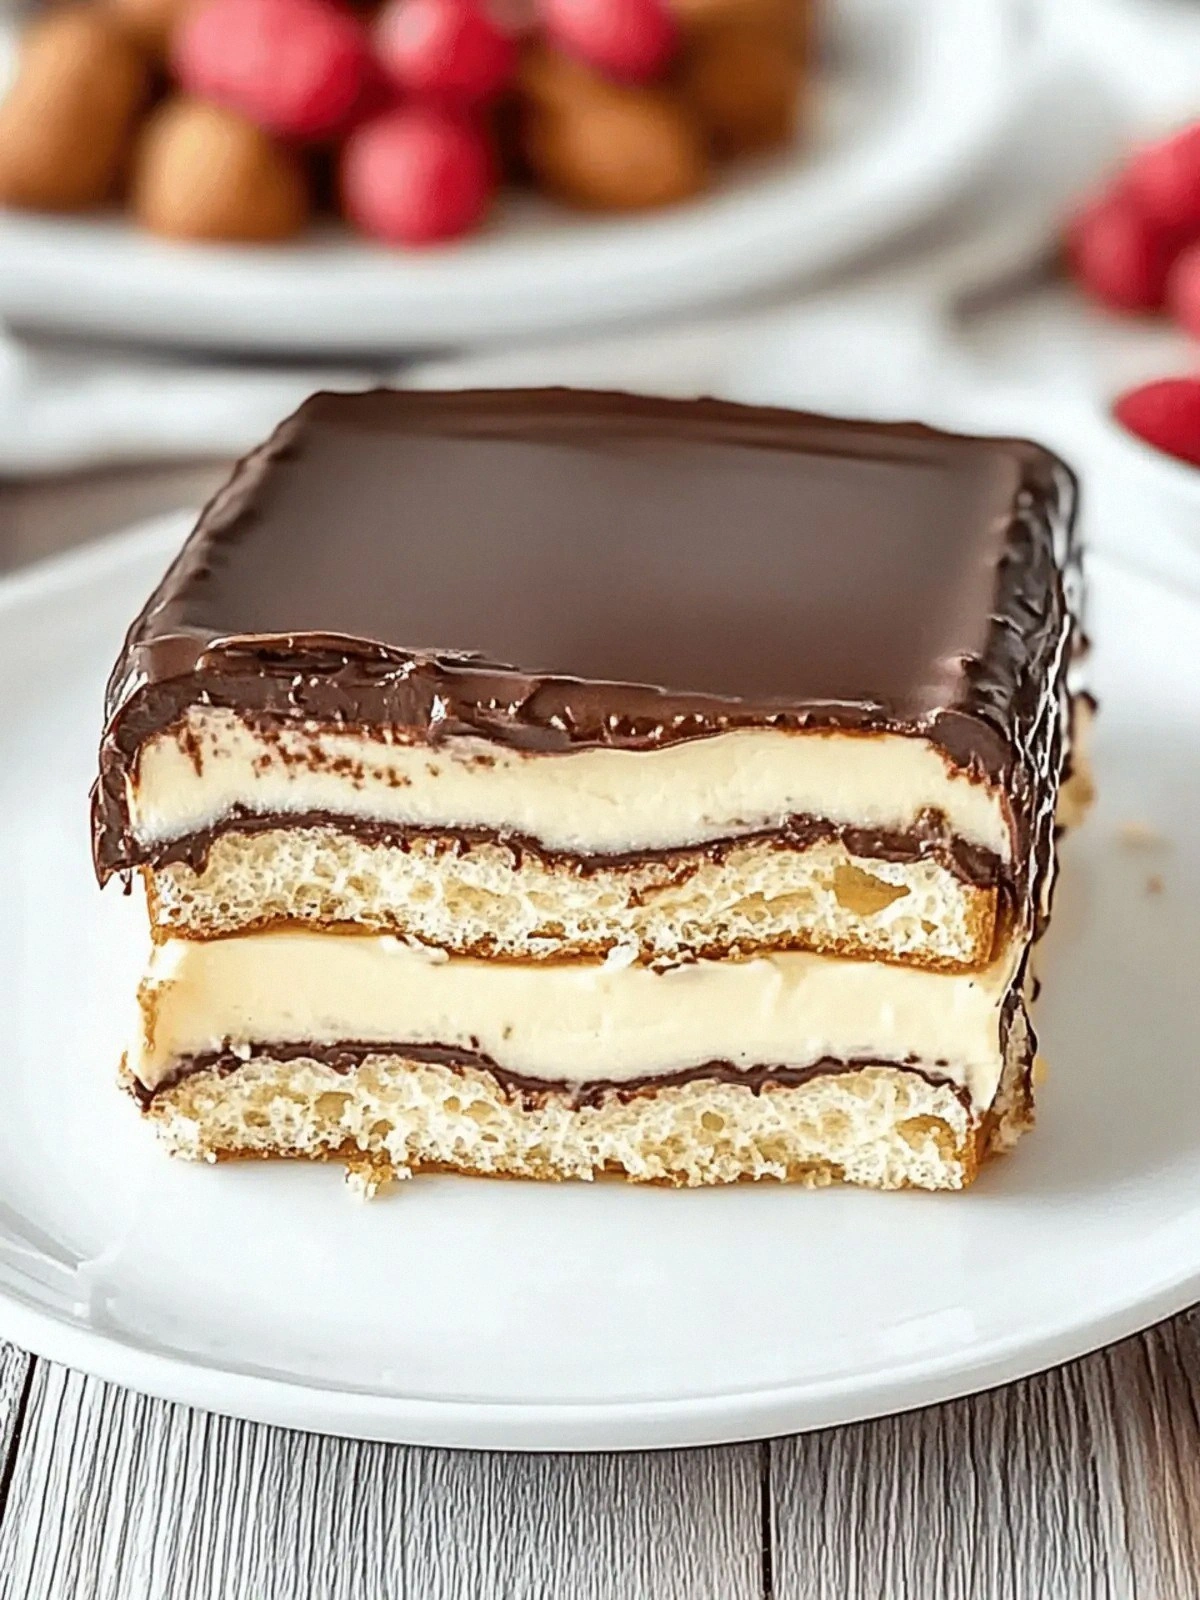
What makes this version stand out? It’s not just a dessert; it’s a revelation. The secret lies in the simplicity of the ingredients—no baking, no fuss, just pure, honest flavor. The graham crackers are crushed to a fine crumb that cradles the pudding like a delicate blanket. The vanilla pudding mix gives a creamy backbone that feels like a cloud of sweetness. The whipped topping adds a playful, airy lift that keeps the mouthfeel light. The chocolate sauce, when drizzled, coats the entire cake like velvet, sealing the experience. Together, they create a dessert that feels both indulgent and effortless.
I dare you to taste this and not go back for seconds. Most recipes get this completely wrong by overmixing or using stale crackers. Here, the balance is precise, the layers distinct, and the finish glossy. The result is hands down the best version you'll ever make at home. The texture is a perfect marriage of crunch and cream. The flavor profile is a bold, unapologetic chocolate experience that doesn’t shy away from its decadence.
I’ll be honest—after I finished the first batch, I ate half before anyone else got to try it. The temptation was so strong that I almost gave it away. The first bite was like a revelation, a burst of chocolate that melted into a silky, sweet aftertaste. My friends were amazed, and I felt like a culinary wizard who had just conjured a masterpiece. The eclair cake became the highlight of every gathering, and I’ve been receiving compliments for months now. It’s a dessert that’s both simple to make and impossible to forget.
Most people think that eclair cakes require a lot of time and skill, but this version is a game-changer. The technique is straightforward, and the result is a layered dessert that looks like it’s been crafted by a pastry chef. The trick is in the layering and the choice of ingredients. The graham crackers provide the crunch, the pudding gives the creaminess, and the chocolate sauce adds that final touch of decadence. If you’re looking for a dessert that’s both impressive and easy, this is the one to try. The best part? You can make it in a fraction of the time of a traditional baked eclair.
Picture yourself pulling this out of the fridge, the whole kitchen smelling incredible, and the guests gathering around like it’s a holiday tradition. The aroma of chocolate and vanilla fills the air, and the sight of the glossy finish invites a taste. The sound of a spoon cutting through the creamy layers is music to your ears. The anticipation builds as you slice into the cake, revealing the layers of crunchy crackers, silky pudding, and chocolate drizzle. Every bite is a moment of pure bliss. You’ll wonder how you ever made it any other way.
Let me walk you through every single step—by the end, you’ll wonder how you ever made it any other way. The next section will break down the unique elements that make this recipe a standout. You’ll see why this version is not just another dessert but a culinary revelation. Stay tuned for the secrets that will elevate your dessert game to new heights. And remember, this is a recipe that’s meant to be shared, celebrated, and enjoyed with a smile. The journey begins now, and the end is a sweet, chocolatey surprise. So grab your apron and let’s dive in.
What Makes This Version Stand Out
- Crunch: The graham crackers are crushed to a fine crumb, creating a buttery, crisp base that contrasts beautifully with the creamy layers. This texture adds a satisfying bite that keeps the dessert interesting. The crunch is a nod to the original eclair’s pastry shell, but with a modern twist.
- Silk: The vanilla pudding mix forms a smooth, airy interior that feels like a cloud of sweetness. It’s light enough to be indulgent, yet dense enough to hold its shape. The pudding’s flavor is pure vanilla, allowing the chocolate to shine.
- Air: Whipped topping introduces a playful lift, giving the cake a light, almost ethereal feel. It balances the density of the crackers and pudding, preventing the dessert from feeling too heavy. The airy texture keeps each bite fresh.
- Velvet: The chocolate sauce coats the entire cake like velvet, sealing the flavors and adding a glossy finish. It’s a dramatic visual cue that signals the dessert’s richness. The sauce’s sheen makes the cake look as good as it tastes.
- Simple: No baking, no whisking, no measuring of obscure spices—just five basic ingredients. This simplicity makes it accessible for beginners and busy cooks alike. The recipe is a reminder that great desserts can be straightforward.
- Make‑Ahead: You can assemble the cake a day in advance, allowing the flavors to meld together. The chilled layers set perfectly, and the chocolate sauce can be added just before serving. This feature makes it a great option for parties or last‑minute events.
Inside the Ingredient List
The Flavor Base
The vanilla pudding mix is the heart of this dessert, providing a creamy, sweet foundation that balances the richness of the chocolate. It’s the glue that holds the layers together, creating a cohesive bite that’s both indulgent and satisfying. Skipping the pudding would leave the cake feeling dry and unstructured, so it’s essential to use the full package. If you prefer a dairy-free option, look for a plant‑based pudding mix that still offers that silky texture.
The Texture Crew
Graham crackers bring the crunch and a buttery flavor that’s reminiscent of a classic eclair. Their coarse texture adds a delightful contrast to the smooth pudding, ensuring each bite is dynamic. If you can’t find graham crackers, you can substitute them with digestive biscuits or shortbread crumbs, but the flavor profile will shift slightly. The key is to keep the crumbs coarse enough to provide that satisfying bite.
The Unexpected Star
Whipped topping is the secret to a light, airy feel that keeps the cake from becoming too dense. It also adds a subtle sweetness that complements the vanilla pudding and chocolate sauce. When using whipped topping, be sure to keep it cold until you’re ready to fold it into the mixture. This prevents it from losing volume and ensures the cake stays fluffy.
The Final Flourish
Chocolate sauce is the crowning glory, adding a glossy finish and a rich chocolate flavor that coats every layer. It also provides a slight caramelization effect on the surface, giving the dessert an eye‑catching sheen. If you want a deeper chocolate flavor, consider using a dark chocolate sauce or a homemade ganache. The sauce should be warm enough to flow smoothly but not so hot that it melts the whipped topping.
Everything's prepped? Good. Let's get into the real action.
The Method — Step by Step
- Crush the crackers: Place the graham crackers in a zip‑lock bag and crush them with a rolling pin until you have a fine crumb. The goal is a texture that feels like crushed cookie crumbs, not fine powder. Keep the mixture in a bowl; it will form the base of the cake. This step is the foundation for the crunch that makes the dessert unforgettable. If you crush them too finely, the cake will feel mushy.
- Prepare the pudding: In a separate bowl, whisk the vanilla pudding mix with the two cups of milk until smooth. The mixture should be thick but pourable, like a silky custard. Let it sit for a minute to allow the mix to thicken fully. This step ensures the pudding is ready to mingle with the other ingredients. The pudding’s consistency is critical for a stable cake.
- Combine the crumbs and pudding: Gently fold the crushed crackers into the pudding mixture, ensuring an even distribution. The crumbs should be fully coated, creating a moist, crumbly base. Stir until the mixture is uniform; it should resemble a thick, moist batter. This combination locks in the crunch and sets the stage for the next layers. A well‑mixed base prevents separation later on.
- Fold in the whipped topping: Carefully fold the whipped topping into the mixture, using a spatula to keep it airy. The whipped topping should remain fluffy, so avoid overmixing. This step introduces a lightness that balances the density of the crumbs and pudding. The airy texture will keep the cake from feeling too heavy. The final mixture should look like a cloud of sweet, buttery crumbs.
- Pour into the pan: Transfer the mixture into a 9-inch square pan lined with parchment. Smooth the top with a spatula, ensuring an even surface. The pan should be at room temperature to help the mixture set evenly. This step is where the cake takes shape. Make sure the mixture is level for a uniform top.
- Chill: Place the pan in the refrigerator for at least 4 hours, ideally overnight, to allow the layers to set. The cake will firm up, making it easy to slice. The chilling process also lets the flavors meld together, creating a harmonious taste. Keep the cake covered to avoid absorption of fridge odors. This step is crucial for the cake’s structure.
- Prepare the chocolate sauce: Warm the chocolate sauce in a small saucepan over low heat until it’s glossy and pourable. Stir occasionally to prevent burning. The sauce should be liquid enough to drizzle but thick enough to coat the cake. Warm it gently to preserve the flavor. This step adds a glossy finish that’s both visual and flavorful.
- Top the cake: Once the cake has set, drizzle the warm chocolate sauce over the top, allowing it to pool into the cracks between layers. The chocolate should cascade like a waterfall, creating a glossy, decadent look. The drizzle adds a final burst of flavor and visual appeal. This is the moment of pure magic. The chocolate will set slightly, adding a nice texture.
- Serve: Slice the cake with a sharp knife, wiping it clean between cuts for neat slices. The cake should hold together, revealing the layers of crunchy crumbs, creamy pudding, and glossy chocolate. Serve chilled, and watch as the guests reach for a piece. The first bite will melt in your mouth, leaving a lingering chocolate aftertaste. Enjoy the applause that follows.
That’s it — you did it. But hold on, I've got a few more tricks that'll take this to another level. These insider tips will help you avoid common pitfalls and elevate the flavor profile even further.
Insider Tricks for Flawless Results
The Temperature Rule Nobody Follows
The temperature of the whipped topping is crucial. If it’s too warm, it will lose its airy structure and become dense. Keep it chilled until you’re ready to fold it in. This trick preserves the lightness that makes the cake feel airy. A cold topping also ensures that the cake doesn’t melt too quickly once served.
Why Your Nose Knows Best
Smell the mixture before chilling. If it smells slightly burnt, the chocolate sauce might have overcooked. A subtle chocolate aroma indicates the right consistency. The scent is a quick quality check that saves you from a ruined dessert. Trust your nose; it’s the ultimate judge of flavor.
The 5-Minute Rest That Changes Everything
After folding in the whipped topping, let the mixture rest for five minutes before pouring it into the pan. This brief pause allows the air to settle, preventing the cake from cracking when it sets. The rest also helps the crumbs to absorb the pudding fully. A short rest makes a big difference in the final texture.
Avoid Overmixing the Pudding
When whisking the vanilla pudding mix, stop once the mixture is smooth. Overwhisking can introduce too much air, causing the cake to rise and then collapse. Keep the mixture thick but pourable. This ensures the layers stay solid and don’t separate during chilling. The key is a gentle, even mix.
Add a Splash of Water Before Reheating
If you need to reheat the cake, add a tiny splash of water before microwaving. The water steams, preventing the cake from drying out. This trick keeps the cake moist and flavorful. It’s a simple step that makes a huge difference. The result is a cake that feels fresh every time.
Creative Twists and Variations
This recipe is a playground. Here are some of my favorite ways to switch things up:
Nutty Crunch
Add chopped walnuts or pecans to the graham cracker crumbs. The nuts introduce a savory depth that balances the sweetness. They also add a pleasant crunch that enhances the texture. This variation is great for guests who love a nutty flavor. The nuts also provide a subtle earthy undertone.
Minty Delight
Infuse the chocolate sauce with a dash of peppermint extract. The mint gives a refreshing twist that pairs beautifully with the chocolate. It’s a perfect dessert for spring or summer gatherings. The mint flavor is subtle yet unmistakable. This version feels like a holiday treat.
Coffee Kick
Stir instant espresso powder into the vanilla pudding mix. The coffee adds a bold, roasted flavor that complements the chocolate. It also provides a slight bitterness that balances the sweetness. This variation is ideal for coffee lovers. The coffee note elevates the dessert to a gourmet level.
Almond Crumble
Replace graham crackers with almond biscotti crumbs. The almond flavor is nutty and slightly sweet, adding a new dimension. The biscotti’s crunch is firm, giving a satisfying bite. This version is gluten‑free and has a more refined taste. It’s a great alternative for those with dietary restrictions.
Citrus Zest
Add a tablespoon of lemon zest to the pudding mixture. The citrus brightens the flavor profile and cuts through the richness. It also adds a subtle zing that makes the dessert feel lighter. This variation works well for a bright, refreshing dessert. The citrus note is a delightful surprise.
Storing and Bringing It Back to Life
Fridge Storage
Store the cake in an airtight container in the refrigerator for up to 3 days. The airtight seal keeps the cake from absorbing fridge odors. Keep the container on a flat surface to maintain the shape. The cake will stay firm and flavorful. Check for any signs of drying before serving.
Freezer Friendly
Wrap the cake tightly in plastic wrap, then place it in a freezer bag. Freeze for up to 2 weeks. When ready to serve, thaw in the refrigerator overnight. The texture remains creamy, and the chocolate stays glossy. This method is perfect for meal prepping.
Best Reheating Method
To revive a chilled cake, microwave on low power for 10-15 seconds. Add a splash of water before microwaving to keep it moist. Gently stir to redistribute the flavors. The cake will regain its creamy texture without becoming soggy. Serve immediately for the best experience.